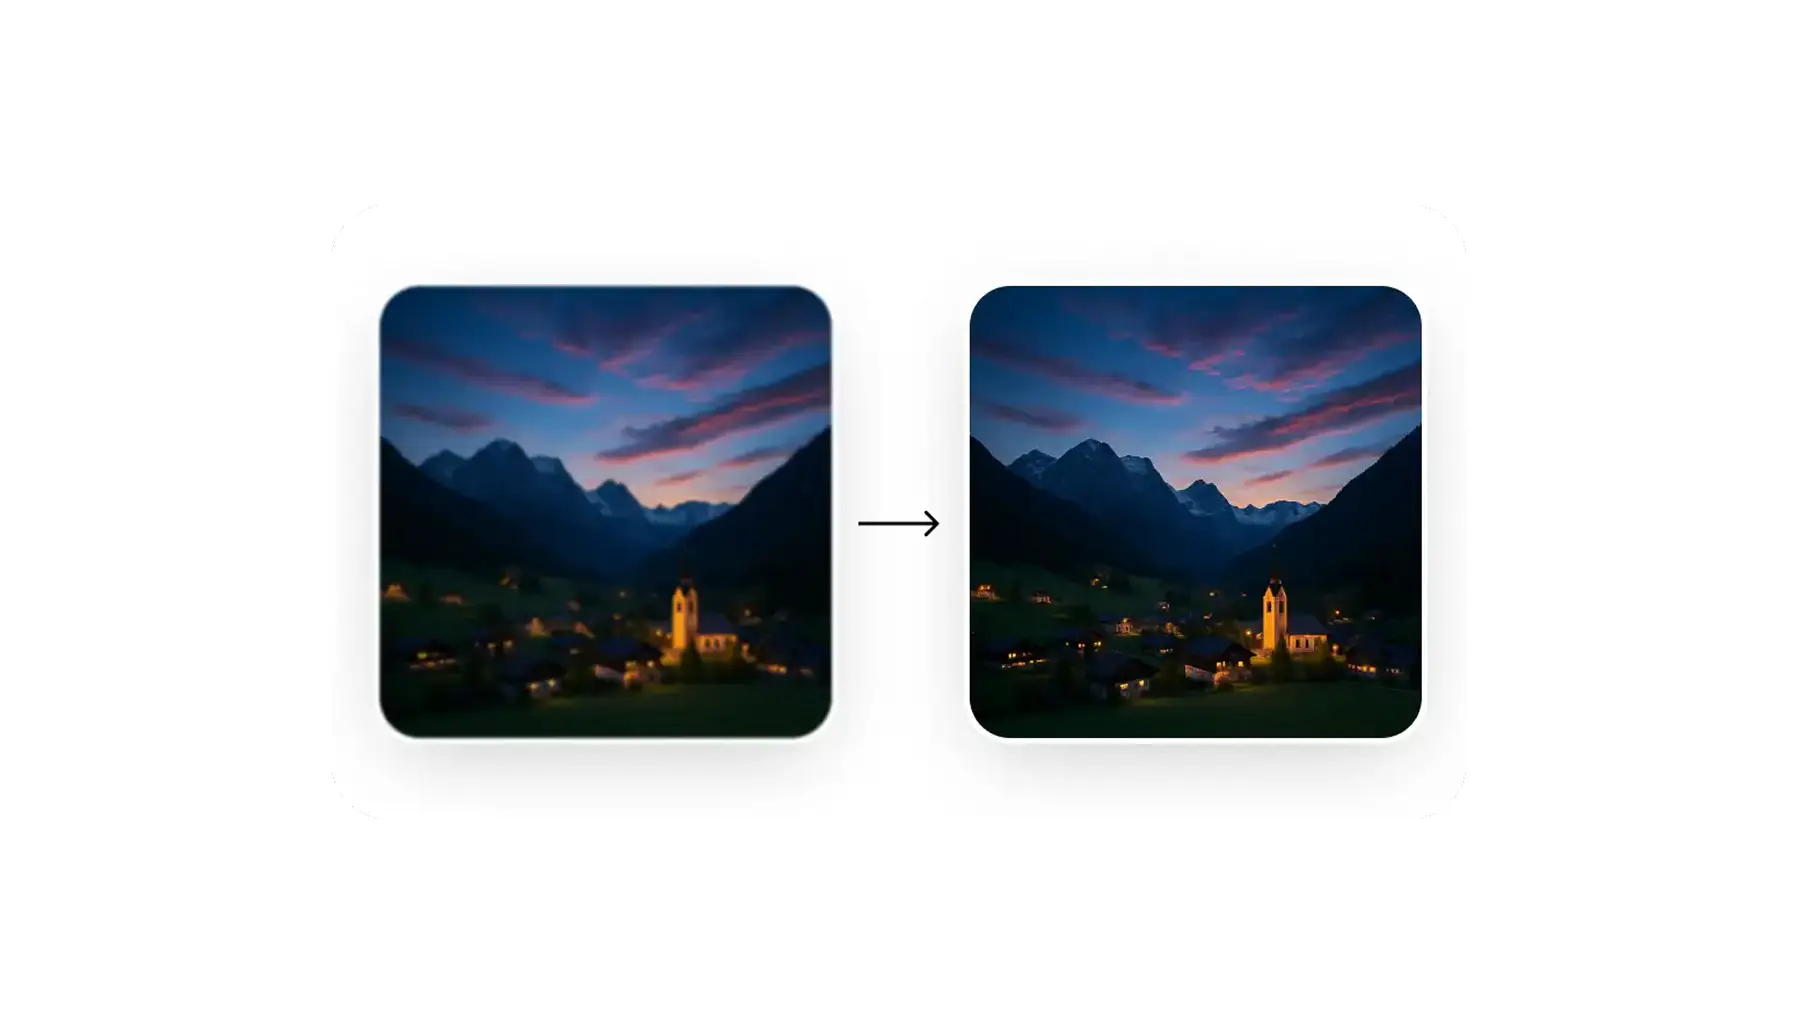
It’s incredibly frustrating when you take a photo that you think will turn out amazing, only for it to come out blurry due to camera shake or being out of focus. Thankfully, blur is easy to fix these days, as you can easily unblur images using AI tools — like Overchat AI — or Photoshop.
In this article, we’ll talk you through simple methods for fixing blurry images and explain how to identify and resolve different types of blur. We'll also provide tips on how to prevent blurry images from happening again.
Blurry photos come from five main causes: camera shake, high ISO noise, shallow depth of field, missed autofocus, and poor lens quality.
Overchat AI Upscaler is the quick free option — reconstructs missing detail instead of just stretching pixels, supports JPG/PNG/WebP up to 10MB.
Topaz Sharpen AI is the pro pick, using separate AI models for motion, focus, and general softness, with batch processing and Photoshop/Lightroom plugins.
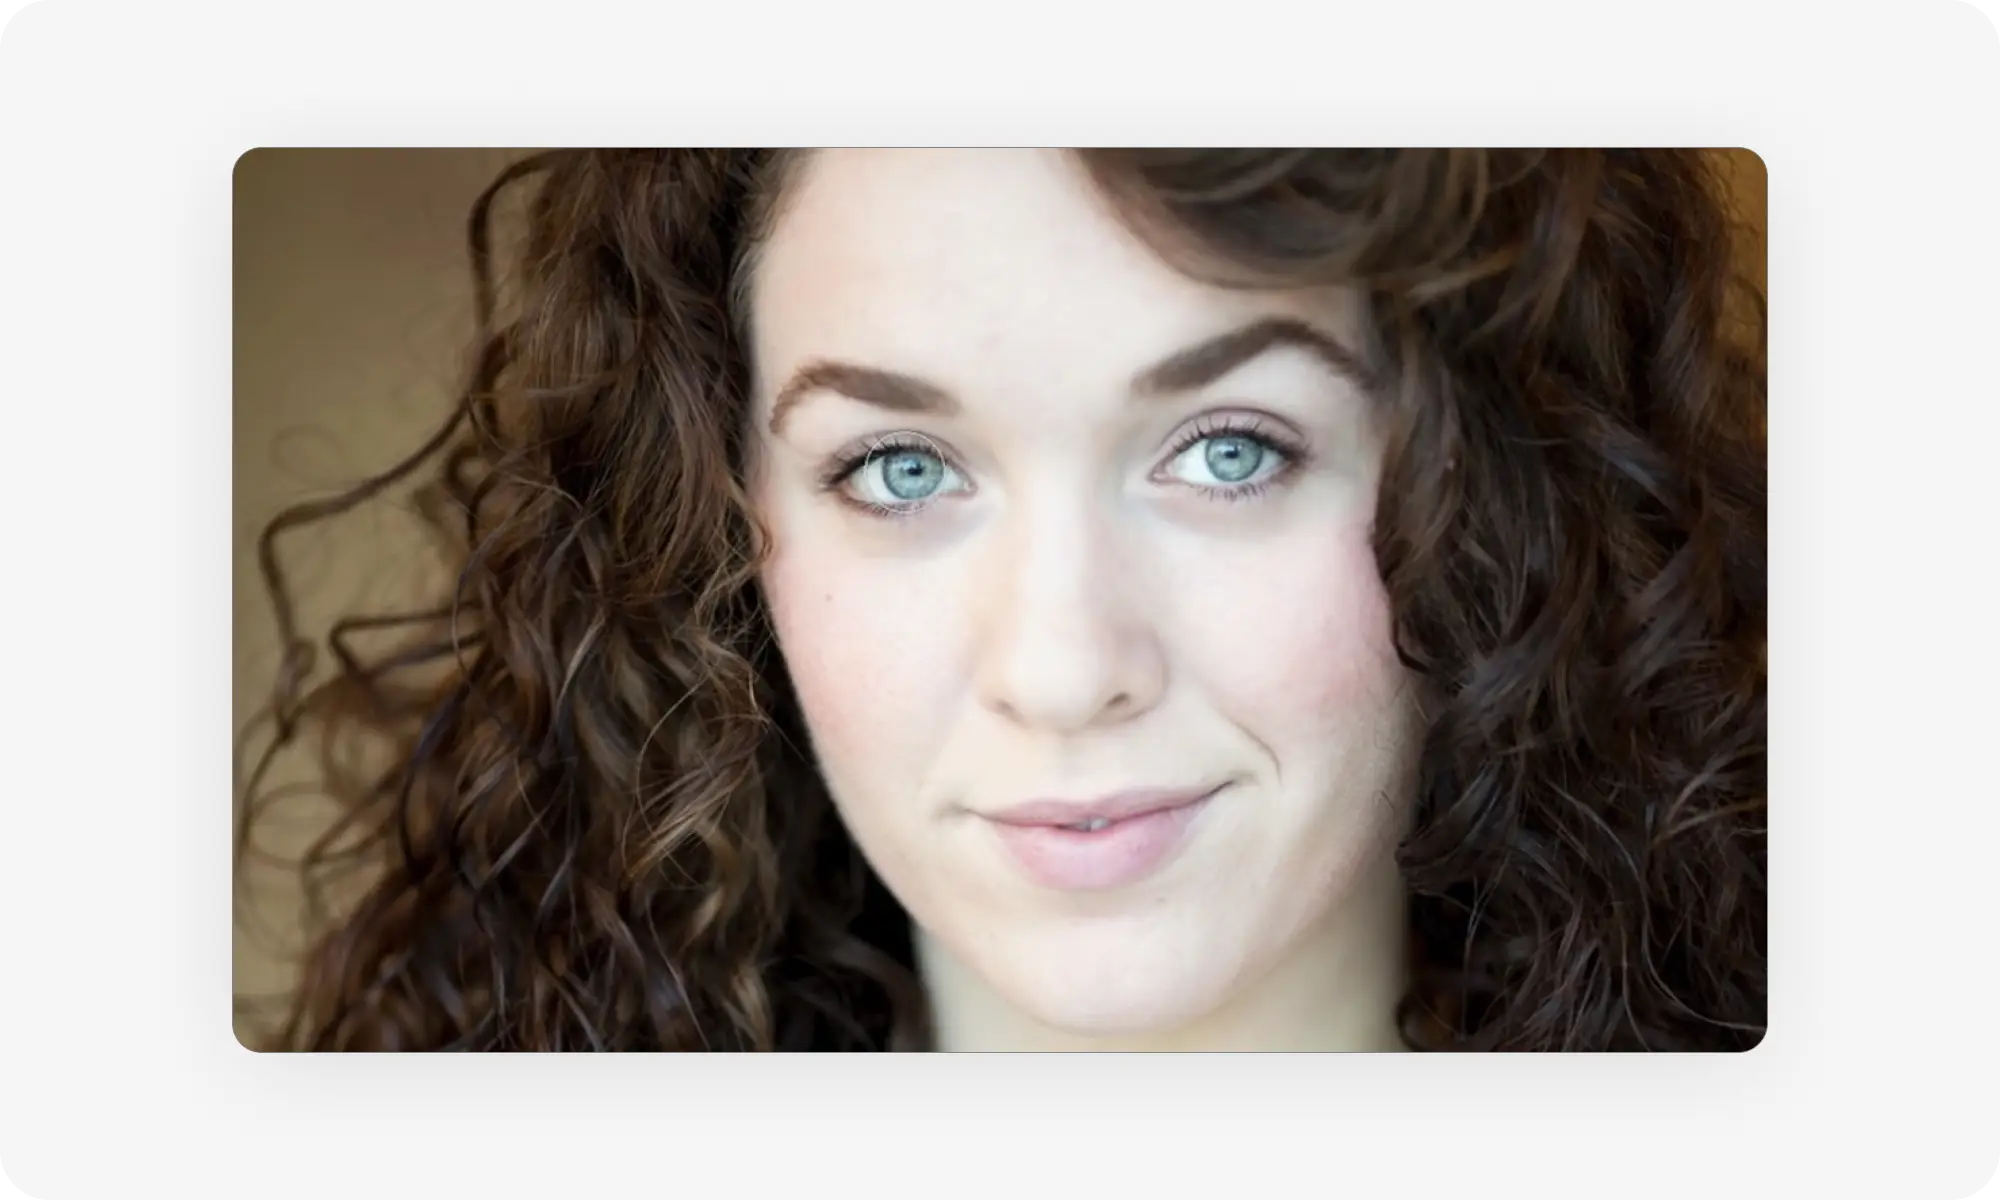
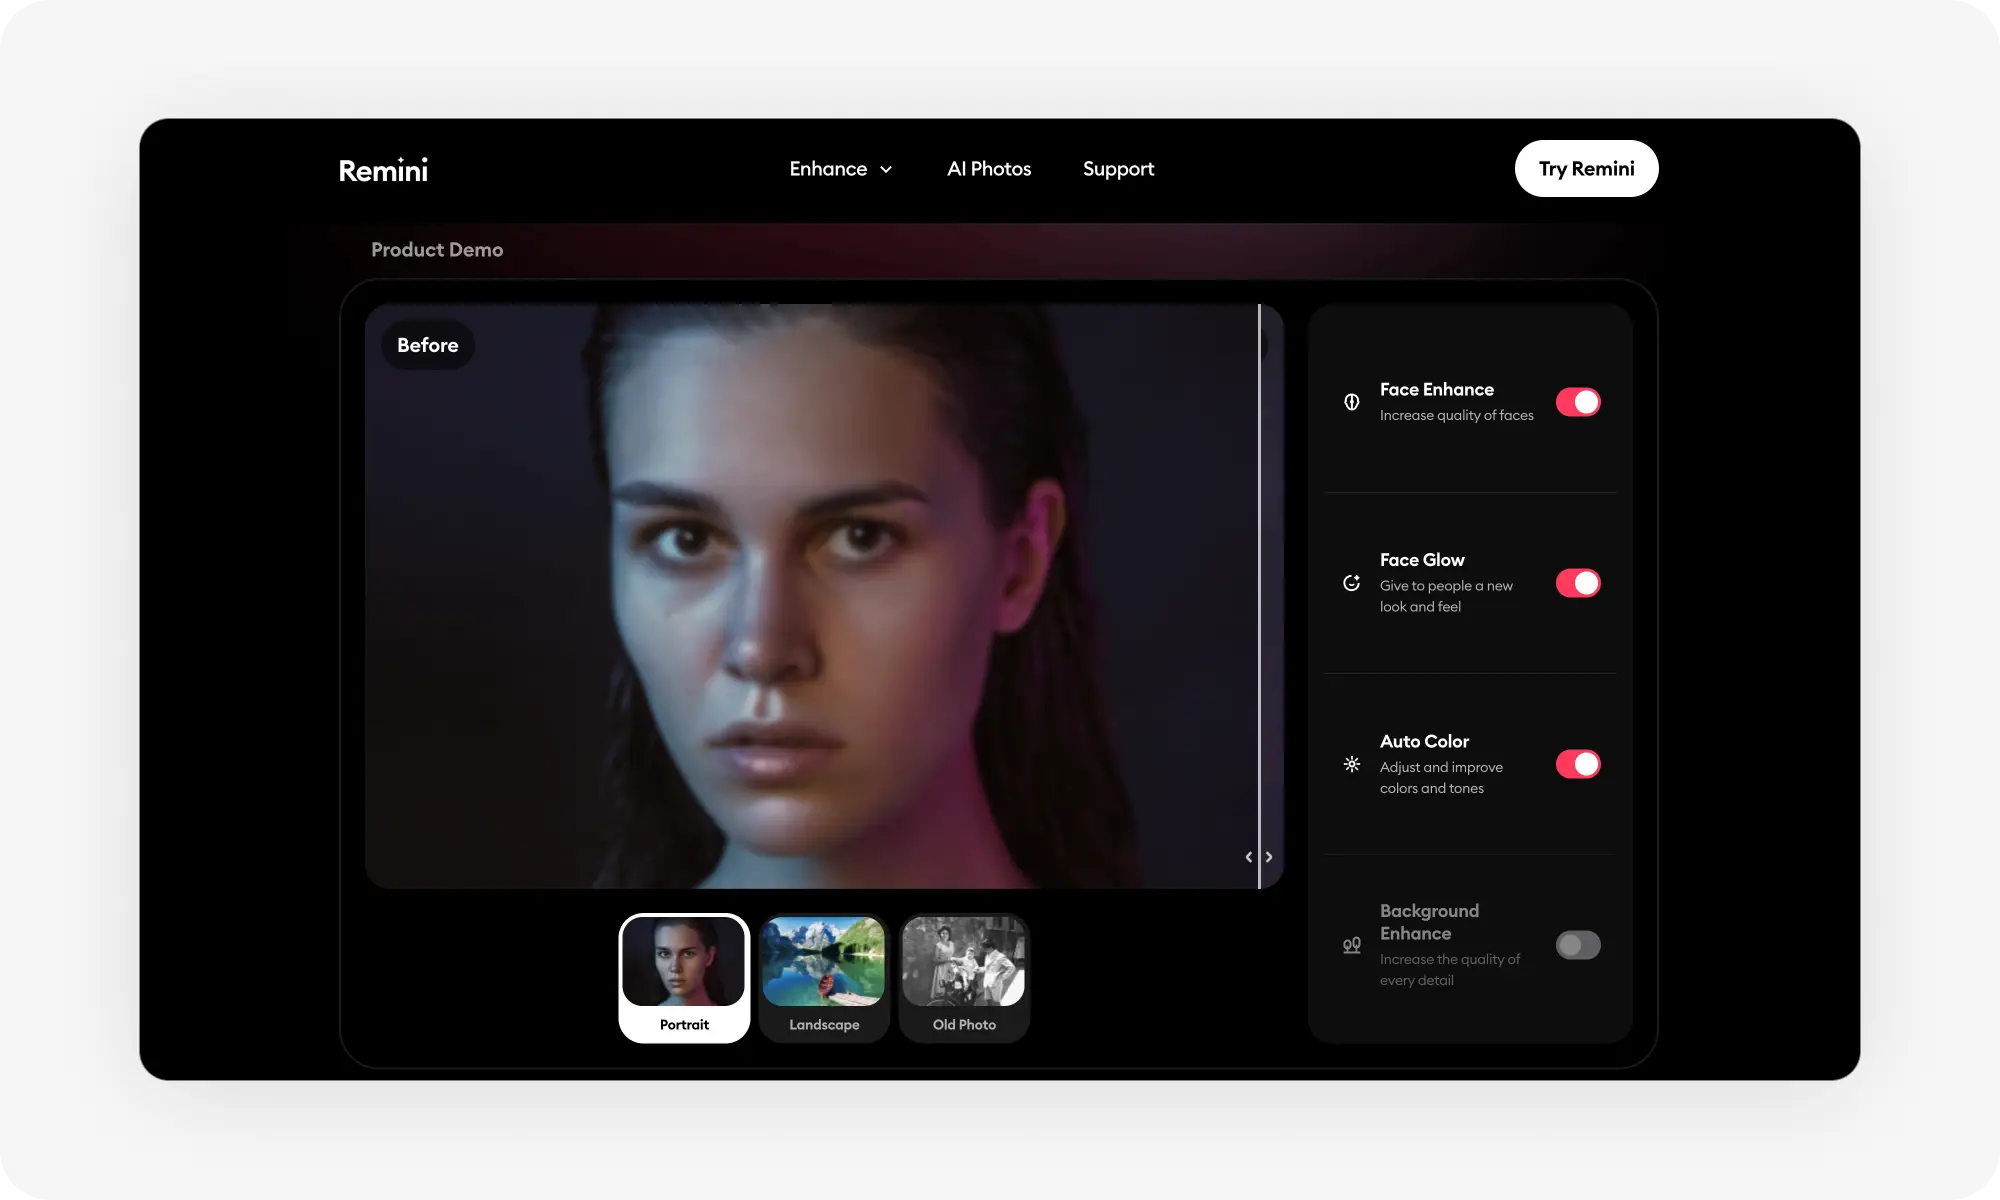
Remini specializes in restoring old, damaged, or compressed photos, especially faces — mobile-first with free (watermarked) and premium tiers.
Photoshop gives more control but takes longer: Shake Reduction for camera shake, Smart Sharpen and Unsharp Mask for general softness, Camera Raw profiles for lens defects.
AI tools handle missed focus and motion blur best; Photoshop wins for lens quality issues and precise creative control.
Prevention basics: shutter speed at 1/focal length or faster, stabilize with a tripod in low light, use manual focus when autofocus struggles, keep ISO as low as possible, and clean your lens before every shoot.
What causes blurry photos?
Before you can fix a blurry photo, you need to understand what caused the blur in the first place, as softness in an image can step from different origins. Here are the most common ones (understanding this will help you pick the right unbluring method).
Camera shake
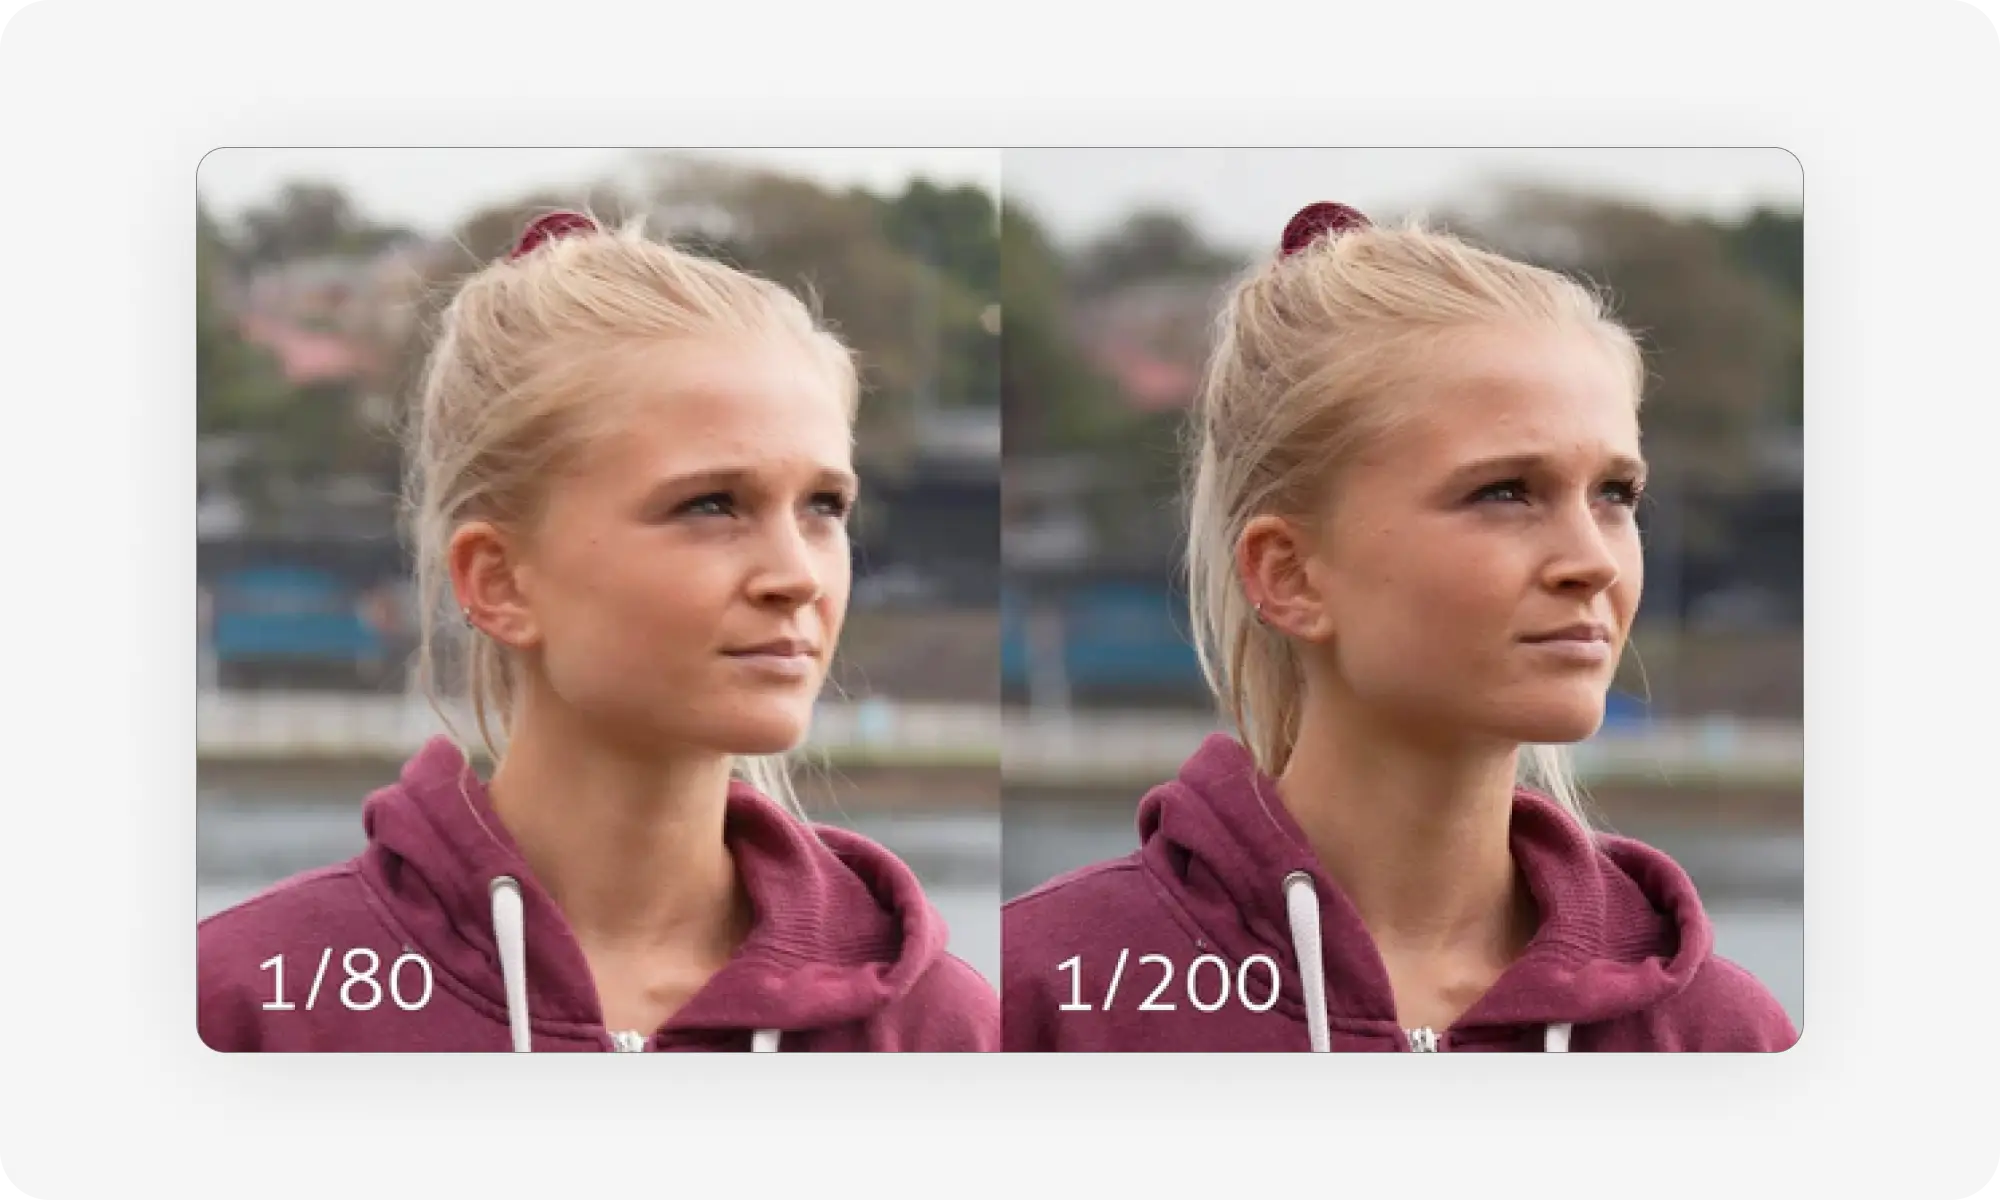
Motion blur happens when your camera moves while the shutter is open. If you're hand-holding your camera with a slow shutter speed, even the smallest hand tremor will create blur across the entire image.
This type of blur is particularly common in low-light situations. When there's not enough light, your camera automatically slows down the shutter speed to let more light in. During that longer exposure time, any movement gets captured as a streak or ghosting effect.
High ISO
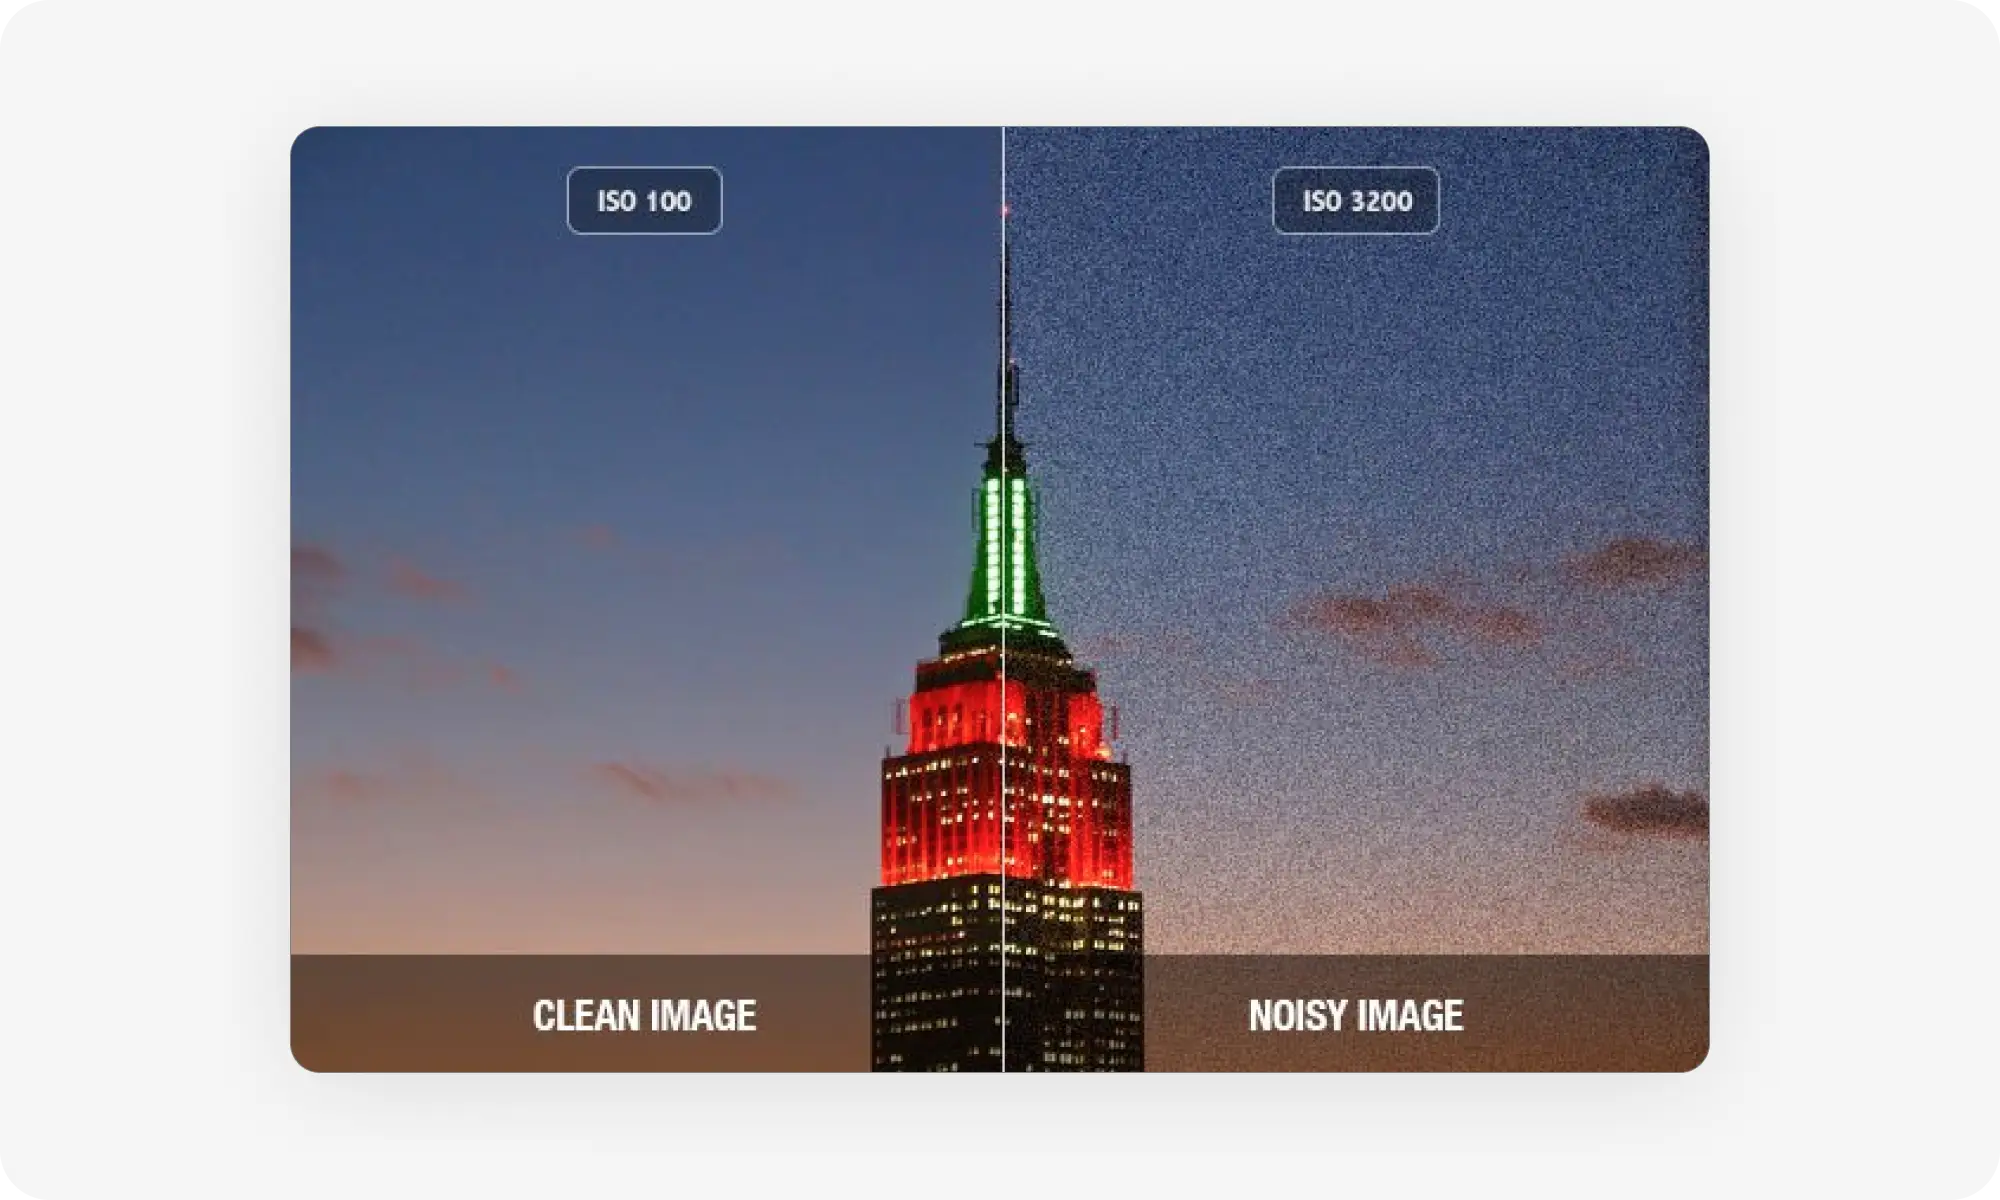
ISO controls how sensitive your camera's sensor is to light. When you're shooting in a dark environment, raising the ISO helps brighten your photo without slowing down the shutter speed. But high ISO comes with a tradeoff — digital noise, which appears as grainy texture and reduces sharpness.
Typically, modern dedicated cameras can shoot up to ISO 6400 with acceptable noise levels, but smartphone cameras will struggle above ISO 800.
Shallow depth of field
Depth of field refers to how much of your photo is in sharp focus from front to back. A shallow depth of field means only a thin slice of your image is sharp, while everything in front of and behind that slice is blurred.
This happens when you use a wide aperture, which is indicated by a low f-stop number like f/1.8 or f/2.8. Portrait photographers often use shallow depth of field intentionally to blur the background and make their subject stand out. The problem is when important parts of your subject fall outside that narrow focus zone.
Missed focus
Sometimes your camera locks onto the wrong part of the scene, leaving your intended subject soft and blurry.
Poor lens quality
The lens you use has a huge impact on image sharpness. Budget lenses often produce soft images, especially at the edges of the frame. This becomes more noticeable when you zoom all the way in or use the widest aperture.
Lenses also sometimes suffer from optical defects: chromatic aberration or spherical aberration. These cause different types of softness that show up in certain situations, like when shooting high-contrast edges or bright light sources.
Best ways to unblur a photo
Now that you understand what causes blur, let's look at how to fix it. There are two main approaches:
AI-powered tools that automatically enhance your images
Manual editing in Photoshop
We'll start with AI tools, then explain how to fix blurry images in Photoshop.
AI-powered image enhancement has changed how we fix blurry photos. These tools use machine learning models trained on millions of images to understand what sharp details should look like. They can intelligently reconstruct missing information rather than just increasing contrast at edges like traditional sharpening does.
The biggest advantage of AI tools is speed and ease of use. You upload your image, click a button, and get results in seconds. Most AI upscalers also work well on severely degraded images where Photoshop's manual tools would struggle.
Here's how the most popular AI unblur tools compare:
Tool
Best For
Key Features
Overchat AI Upscaler
Fast everyday upscaling
Industry-leading AI model, good quality-to-speed ratio, supports JPG/PNG/WebP
Photoroom
E-commerce product photos
AI sharpening, upscaling, background removal, mobile-friendly
Topaz Sharpen AI
Professional photography
Multiple AI models for different blur types, batch processing
Remini
Old photo restoration
Face enhancement, portrait restoration, mobile-first
Overchat AI Upscaler
Overchat AI image upscaler uses an industry-standard AI upscaling model that balances performance with speed. It's designed for everyday use when you need to quickly enhance low-resolution images without losing quality. The tool intelligently reconstructs missing details instead of just stretching pixels, which keeps your images crisp and clean. It supports common image formats like JPG, PNG, and WebP with a maximum file size of 10MB, making it suitable for most photos and graphics.
Photoroom
Photoroom is built specifically for e-commerce and product photography, though it works well for any type of image. The app offers AI-powered sharpening through its adjustments panel where you can increase sharpness, contrast, brightness, and clarity. Its AI Upscale feature is available on iOS and gives you three options: Enhance keeps the original look while sharpening, Transform adds missing details for a cleaner finish, and Reimagine creates a high-resolution version inspired by your image. Photoroom also includes background removal and object removal tools, which help clean up distracting elements that make blur more noticeable.
Topaz Sharpen AI
Topaz Sharpen AI is a professional-grade tool that uses multiple AI models trained on different types of blur. It can distinguish between motion blur, focus blur, and general softness, then apply the appropriate correction algorithm. The software works as a standalone application or as a plugin for Photoshop and Lightroom. It's particularly effective for recovering detail in challenging situations like wildlife photography or low-light shots where other tools fail. Topaz also supports batch processing, which is useful if you need to fix multiple images from the same shoot.
Remini
Remini focuses on restoring old, damaged, or low-quality photos. The app is popular for enhancing old family photos, scanned documents, and compressed social media images. It uses AI to add detail and clarity to faces, which makes it especially good for portrait restoration. Remini is mobile-first with apps for iOS and Android, making it convenient for quick fixes on your phone. The free version adds a watermark, while the premium subscription removes it and allows unlimited enhancements.
Using Photoshop
Photoshop gives you more control over how you sharpen and unblur images compared to AI tools — it takes more time but in some situations produces better results. Here are the main tools and techniques for unblurring images in Photoshop:
Shake Reduction Filter
The Shake Reduction filter is designed for fixing blur caused by camera shake. To use it:
Open your image in Photoshop and select the layer
Go to Filter → Convert for Smart Filters to preserve the original quality
Go to Filter → Sharpen → Shake Reduction
Photoshop automatically detects blurry areas and applies corrections
In the Advanced panel, click Add suggested blur trace to focus on additional blurry areas
Apply multiple blur traces to cover all problem areas
Review the results and adjust the blur trace bounds if needed
Smart Sharpen Filter
Smart Sharpen is the most versatile sharpening tool in Photoshop. It can detect edges and applies sharpening intelligently without creating too much noise. To use it:
Open your image and duplicate the layer
Right-click the layer and select Convert to Smart Object
Go to Filter → Sharpen → Smart Sharpen
Adjust the Amount slider to control sharpening intensity (start around 100-150%)
Adjust the Radius to set the size of details being sharpened (usually 0.5-2.0 pixels works best)
Set the Reduce Noise slider to prevent amplifying grain
Choose the blur type: Lens Blur for focus issues, Motion Blur for camera shake, or Gaussian Blur for general softness
Preview your changes and click OK when satisfied
Unsharp Mask
Despite its confusing name, Unsharp Mask is one of the most reliable sharpening tools. It creates a blurred copy of your image, compares it to the original, then increases contrast where differences are found. This technique has been used in photography for decades.
To use it:
Open your image in Photoshop
Go to Filter → Sharpen → Unsharp Mask
Adjust Amount (controls sharpening intensity, typically 50-150%)
Adjust Radius (determines the size of details to sharpen, usually 0.5-2.0 pixels)
Adjust Threshold (prevents sharpening noise, start at 0 and increase if needed)
Preview the effect and click OK
Unsharp Mask is particularly good for portraits and product photography where you need to sharpen details without making the image look artificial.
High Pass Filter
The High Pass filter is a more advanced technique that gives you maximum control over sharpening. It works by isolating edges and details, which you can then blend with your original image using layer blending modes. To use it:
Open your image and duplicate the layer
Go to Filter → Other → High Pass
Set the Radius to a low value (0.5-3.0 pixels depending on your image size)
The image will turn gray with visible edges
Click OK, then change the layer blending mode to Overlay, Soft Light, or Hard Light
Adjust layer opacity to control the sharpening strength
For more control, go to Layer → Smart Filter Blending Options and experiment with different blending modes
Camera Raw Lens Corrections
If your blur is caused by lens quality issues, Camera Raw's lens correction profiles are the best solution. Adobe maintains a database of lens profiles that automatically correct distortion, vignetting, and chromatic aberration. To use it:
Open your image in Camera Raw (or convert it to a Smart Object and open in Camera Raw Filter)
Go to the Lens Corrections panel
Check Enable Profile Corrections
Which tool works best for each type of blur?
Type of Blur
Best Solution
Camera or subject movement
AI Tools
High ISO levels
Photoshop
Shallow depth of field
Limited Fix
Missed focus
AI Tools
Poor lens quality
Photoshop
How to prevent blurry photos
Fixing blurry photos is helpful, but preventing them in the first place still produces better results. Here are practical steps to capture sharp images from the start:
Use a faster shutter speed
Shutter speed is the most important factor in preventing motion blur. As a general rule, your shutter speed should be at least 1/focal length of your lens. If you're shooting with a 50mm lens, use 1/50th of a second or faster.
Stabilize your camera
Camera shake is one of the easiest problems to fix. Use a tripod whenever possible, especially in low light or when using long lenses. Even an inexpensive tripod is better than handholding at slow shutter speeds.
Master manual focus
Autofocus is convenient but not always reliable. Switch to manual focus when shooting through glass, in low contrast situations, or when your subject isn't in the center of the frame.
Choose the right aperture
A wide aperture like f/1.8 creates beautiful background blur but gives you a razor-thin focus zone. If part of your subject falls outside that zone, it will be soft no matter how carefully you focus. Instead, try these settings:
For product photography, use f/8 or f/11 to keep everything sharp.
For portraits, f/2.8 to f/5.6 usually gives you enough depth to keep the face in focus while still blurring the background.
Group photos need f/8 or smaller to keep everyone sharp.
Lower your ISO when possible
High ISO introduces noise that makes your images look soft. Use the lowest ISO you can while maintaining a fast enough shutter speed. Modern cameras handle ISO 800–1600 reasonably well, but stay below that when lighting conditions allow.
Keep your lens clean
Dust, smudges, and fingerprints scatter light and reduce image sharpness. Check your lens before each shoot and clean it with a proper lens cloth or brush. Also check your camera's sensor for dust spots. If you see repeated dark spots in the same location across multiple photos, your sensor needs cleaning. Many cameras have a sensor cleaning function, or you can have it professionally cleaned.
Frequently Asked Questions (FAQs)
What causes most photos to blur?
Camera shake and missed focus are the two most common causes of blurry photos. Camera shake happens when you handhold your camera at slow shutter speeds, causing the entire image to appear soft. Missed focus occurs when your autofocus system locks onto the wrong part of the scene, leaving your intended subject out of focus.
Can you completely fix a blurry photo?
It depends on the type of blur and which tool you're using. AI tools can reconstruct detail in areas that are out of focus by generating new information based on patterns learned from millions of images. This means they can often recover severely blurred photos, including those with motion blur or missed focus.
Photoshop's sharpening tools work differently. They enhance existing detail by increasing edge contrast, so they need some original information to work with. They perform best on slightly soft images rather than severely blurred ones.
What's the difference between sharpening and upscaling?
Sharpening increases the contrast at edges to make an image appear crisper without changing its resolution. It works by emphasizing the boundaries between different tones and colors.
Upscaling increases the pixel dimensions of an image, making it physically larger. Traditional upscaling just stretches pixels, which makes images look blocky. Modern AI upscaling analyzes the image and intelligently adds new pixels with realistic detail.
Are free unblur tools effective?
Free AI tools like Overchat AI Upscaler and Photoroom can produce excellent results. They use the same core AI technology as paid tools.
Bottom Line
Blurry photos don't have to be a lost cause anymore.
Key takeaways:
Photos become blurry due to camera shake, high ISO, shallow depth of field, and missed focus.
In 2026, it is possible to completely recover a blurry image.
AI tools like Overchat AI Upscaler can reconstruct missing detail and fix blur quickly.
Alternatively, Photoshop gives you more creative control over selective sharpening.
Different blur types respond better to different solutions: missed focus and motion blur work well with AI, while lens quality issues need Photoshop's Camera Raw profiles.
To prevent blurry images use faster shutter speeds, stabilize your camera, and master manual focus.
No matter whether you use AI or Photoshop to unblur your image, you now have multiple ways to rescue blurry images and improve your photography workflow.