How to Remove a Background From an Image: A Detailed Guide
Last Updated:
2026-06-09
How to Remove a Background From an Image: A Detailed Guide
There are plenty of situations where you might want to turn a solid background transparent or isolate the subject of a photo — for example, when placing a person into a different scene or changing the backdrop color of a product shot.
Until recently, this kind of work was pretty difficult, especially with tricky subjects like hair, foliage, or backlit scenes. These often introduced artifacts that made it hard to get a clean mask and fully remove the background.
But in 2025/2026, AI tools (like Overchat AI Background remover) have gotten so good that you barely need to do any manual work at all — background removal has basically become a one-click process.
With that in mind, let’s look at the three main ways you can remove a background from an image:
Manually, using Photoshop’s selection tools
Using Photoshop’s automated masking features
Using AI background-removal tools
We’ll go over when to use each method and also give you a detailed breakdown of the best online AI background-removal software. Let’s dive in.
Photoshop's Select Subject tool auto-detects your subject with one click and works well as a starting point for clean portraits or products with defined edges.
Photoshop's Select and Mask tool gives you finer control via Refine Edge Brush, Edge Detection, Shift Edge, and Feather sliders — necessary for wispy hair, fur, semi-transparent objects, or low-contrast subjects.
Use Photoshop when you want complete control over edge quality, are working with very high-resolution files, and don't mind spending 1–3 hours on a clean mask.
AI background removers now produce results comparable to manual Photoshop cutouts for most use cases, with a 2–3 step workflow: upload, process, download PNG.
AI tools still struggle with busy backgrounds, subjects that blend into surroundings, semi-transparent objects (glass, fabric), and shadows — which either disappear or stick around unwanted.
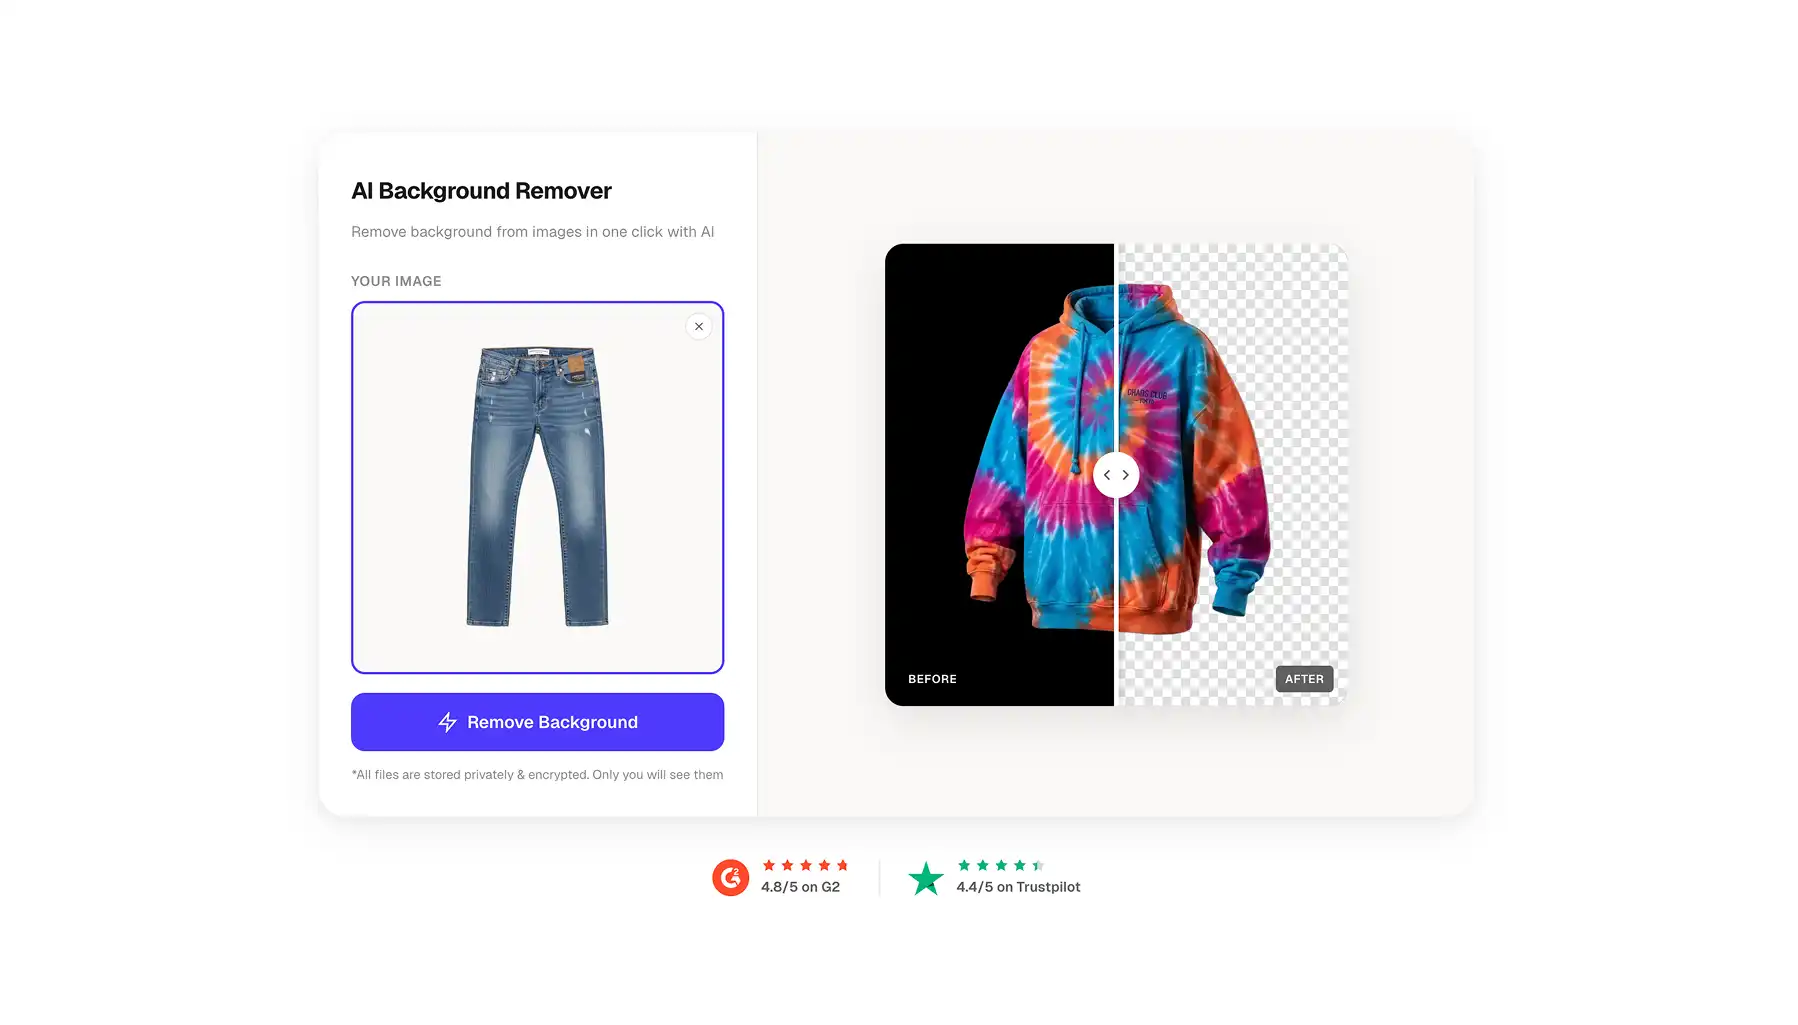
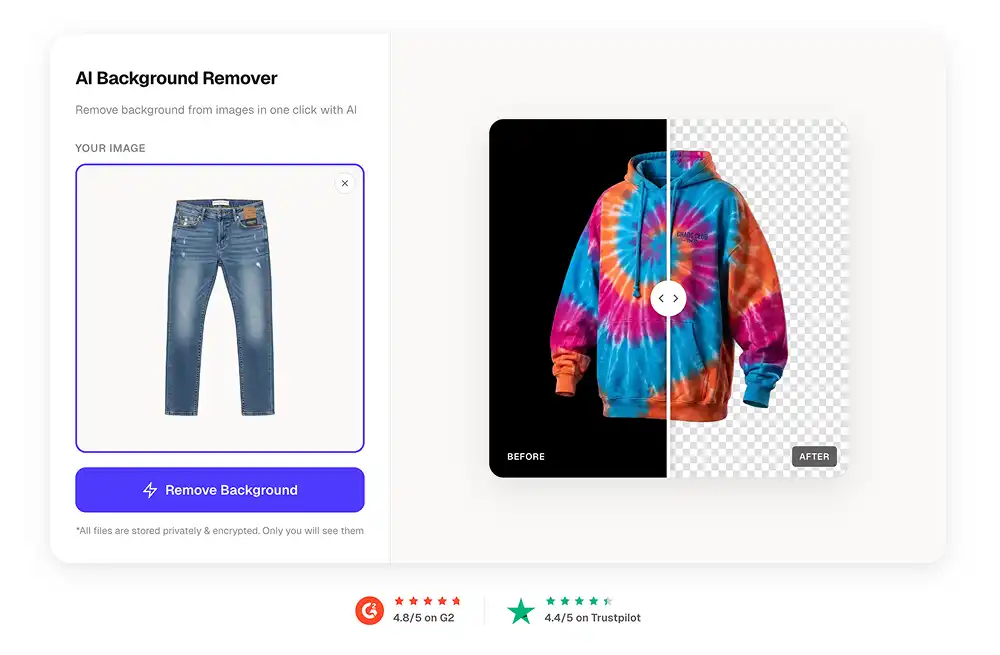
Overchat AI uses an advanced edge-detection algorithm that produces virtually flawless cutouts — even against pure black backgrounds — preserving fine detail like hair strands without haloing. No batch upload, but video background removal is available.
Canva's remover is baked into its design platform, letting you go straight from cutout to adding backgrounds, text, and templates — but you need Canva Pro, and results aren't as clean as competitors.
Fotor supports batch processing for up to 50 images at once, making it useful for medium ecommerce catalogues, though the free tier has watermarks and lower-res exports.
Adobe Express is completely free for basic removal with no credit card, integrates with Creative Cloud, but needs a $9.99/month Premium subscription for video removal.
Remove.bg is built purely for speed — 2.5 seconds per image, up to 500 images/minute, 50MP resolution support, and a robust API with plugins for Photoshop and Figma. Ideal for high-volume ecommerce batches.
For best AI results: use high-resolution images (1000px+), strong directional lighting, and strong contrast between subject and background (light subject on dark, or vice versa).
Export as PNG to preserve transparency (WEBP if you need compression for web). JPEG won't work — it fills transparency with solid color, usually white.
Bonus tip: zoom to 100% after processing to check for artifacts or rough edges — you can often fix them by running the tool again.
How to Remove Background from Images in Photoshop
Photoshop is the classic, tried-and-true way to remove backgrounds, and there are still situations where it’s the best option — especially when you need maximum manual control.
This can be essential when working with wispy hair, fine fur, semi-transparent objects, or subjects whose colors closely match the background. There are two ways to isolate a subject in photoshop and remove the background:
Select subject tool
Select and Mask tool
How to Remove a Background With Select Subject
Modern Photoshop versions include Select Subject, which detects your main subject automatically. It works well as a starting point for clean portraits or products with clear edges.
Open Photoshop and go to File → Open
Navigate to your image file and click Open
In the top menu, click Select → Subject
Wait for Photoshop to draw a selection around your subject
Right-click on the background layer in the Layers panel and choose Layer from Background to unlock it
Click the Add Layer Mask button at the bottom of the Layers panel (rectangle with a circle icon)
Go to File → Export → Export As
Choose PNG from the format dropdown to preserve transparency
Click Export All and choose your save location
How to Remove a Background With Select and Mask
For trickier images, Select and Mask tends to give you better results. Here’s how to use it:
Open your image in Photoshop via File → Open
Click Select → Subject to create your initial selection
Click Select and Mask in the top toolbar (or press Alt + Ctrl + R on Windows, Option + Command + R on Mac)
In the Properties panel on the right, set View Mode to On Black or On White to see edges clearly
Select the Refine Edge Brush from the left toolbar
Paint over problem areas like hair, fur, or detailed edges
Adjust the Edge Detection slider (typically between 1-3 pixels for most images)
Use the Shift Edge slider to contract or expand your selection (-100% to +100%)
Add Feather (usually 0.5-2 pixels) for natural blends
Set Output To dropdown to New Layer with Layer Mask
Click OK to apply your refined selection
Go to File > Export > Export As
Select PNG format to keep transparency
Click Export All and save your file
By using this process, you can fine-tune edge detection, shift selection borders, smooth out jagged edges, and add feathering — all of which help produce better results with detailed subjects like flyaway hair against busy backgrounds. You’ll retain more of the fine detail in the cutout without creating halos.
When to Use Photoshop
You want complete control over the edge quality
You already have access to Photoshop
You’re working with a very high resolution file
You don’t mind spending extra time creating a clean mask (prepare to spend 1–3 hours on this)
The downside of this method is that it comes with a learning curve and leaves room for user error. Even if you put in the time, you can still end up with an underwhelming — or even unusable — result.
How to Remove Background from Images Using Online AI Tools
AI background-removal tools use advanced artificial intelligence and machine-learning models trained on millions of images to detect the subject, separate the foreground from the background, and generate clean cutouts automatically. In other words, they do what Photoshop does — just without the manual work.
Until recently, these tools were only reliable for simple images with clear separation between subject and background. But they’ve improved so much that we’re now at a point where the quality is often comparable to manual cutouts.
That said, there are still a few important considerations, which we’ll cover later.
How to Use AI Background Removal Tools
Most AI background removers follow the same basic process. You upload an image, the AI processes it, and you download a transparent PNG.
Visit the AI background removal tool website (pick any tool from this list)
Click the upload button or drag your image onto the page
Wait 2-10 seconds while the AI processes your image
Preview the result to check edge quality
Download the processed image as a PNG file
Done!
Some tools offer additional options like adding new backgrounds, or batch processing multiple images at once.
When to Use AI Background Removers
You’re processing many images and care about speed
You’re removing backgrounds for product photos and eCommerce listings
You’re working with logos or other graphical elements (these always have good contrast, which tends to produce great results)
You’re working with images that aren’t terribly high-res (otherwise, you sacrifice some resolution at the download phase)
Limitations of AI Background Removal
AI tools can struggle with complex scenarios. Images with busy backgrounds, subjects that blend into their surroundings, or intricate details like hair against complex patterns may need manual cleanup afterward.
Shadows and reflections sometimes disappear when you want them kept, or stick around when you don't. Semi-transparent objects like glass or fabric can confuse the algorithm.
Most AI background removers offer free tiers with limitations—lower resolution exports, watermarks, or limited monthly processing. Paid plans unlock full resolution, bulk processing, and API access for developers.
Best AI Background Removal Tools
If you've decided to use online AI background removal tools, the next step is choosing the right tool, as there are many platforms that support free AI background removal online.
We’ve tested all of them, and here's how the top options compare:
The cutouts it produces are virtually flawless — even when previewed against pure black backgrounds (typically the most demanding test, since it reveals any haloing).
This makes it ideal for situations where you need to preserve fine detail and other AI tools might blur edges, leave halos, or cut off parts of the subject.
Using the tool is extremely simple:
Upload your image
The AI processes it
Download the final PNG
The interface is straightforward and requires no manual adjustments — it’s literally a three-step process with no room for error.
Overchat performs especially well with product photos featuring varied textures, portraits with intricate hair details, and images where you want to maintain natural soft shadows.
Advantages:
✅ Handles complex edges better than most competitors
✅ Preserves fine details like hair strands and fabric texture
✅ Fast processing even with high-resolution images
✅ Clean interface without overwhelming options
✅ Video background removal available
✅ Desktop and mobile versions
Disadvantages:
❌ Fewer integrated design tools compared to Canva
❌ No batch upload
Canva Background Remover
Canva is a fully-fledged online design platform that also includes a background remover. This allows you to edit transparent images immediately after creating them. For instance, you can add graphics, fonts, and layouts all in one place.
The background remover works with one click inside Canva's editor.
Upload your image
Select it
Click BG Remover under the toolbar
The background disappears
Immediately add new backgrounds, text, or icons
Canva’s primary use is graphic design for the web — think ad banners, social media post images, thumbnails, infographics or anything you might use in online marketing.
Advantages:
✅ All-in-one platform with design tools included
✅ One free background removal to try the feature
✅ Massive template library for various formats
✅ Video background removal available
Disadvantages:
❌ Requires Canva Pro subscription
❌ You’re paying for features you might never use
❌ Results aren’t as good as some competitors
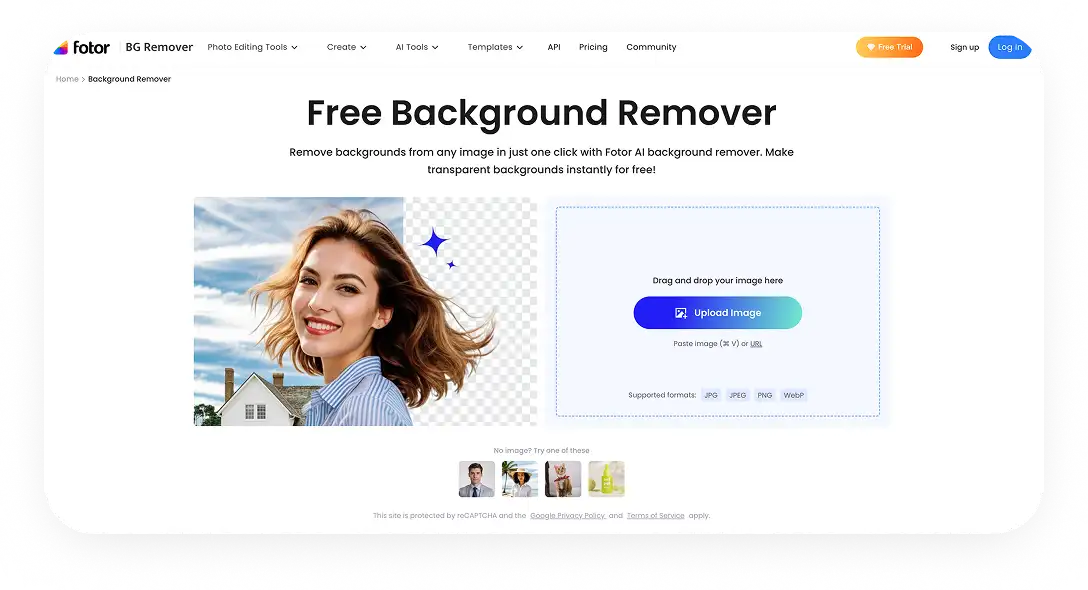
Fotor Background Remover
Fotor is another online background remover that works really well, with a focus on quick and high-quality photo edits for those who don’t want to tinker with settings.
To remove a background in Fotor:
Upload your image to the Fotor website
Let the AI generate a transparent version
Download the resulting PNG
Like Photoshop, Fotor gives you touch-up tools to refine edges manually if you need to, though these are a lot less accurate than Adobe’s pro-level versions.
On the other hand, Fotor has batch processing — you can remove backgrounds from up to 50 images at once, which is a huge time saver if you need to process a medium-to-large ecommerce catalogue, for example.
Advantages:
✅ Batch processing for up to 50 images
✅ Simple interface without learning curve
✅ Supports various output formats
✅ Additional photo editing tools
Disadvantages:
❌ Free version includes watermarks
❌ Lower resolution exports on free tier
Adobe Express Background Remover
Adobe Express brings Adobe's AI technology to a simplified web interface. The tool works completely free without requiring Adobe Creative Cloud, though signing in unlocks additional features.
The background remover processes images in seconds with Adobe's computer vision algorithms. Results integrate directly with Adobe Express's design tools, fonts, and stock library if you want to continue editing.
Adobe Express works particularly well if you already use Adobe products, as files sync across the ecosystem. The tool also offers video background removal for Premium subscribers.
Advantages:
✅ Completely free for basic background removal
✅ No credit card required to start
✅ Integrates with Adobe Creative Cloud
✅ Desktop and mobile versions
Disadvantages:
❌ Requires Adobe account after first use
❌ Video background removal needs Premium subscription
❌ Limited manual refinement tools compared to Photoshop
❌ Premium features require $9.99/month subscription
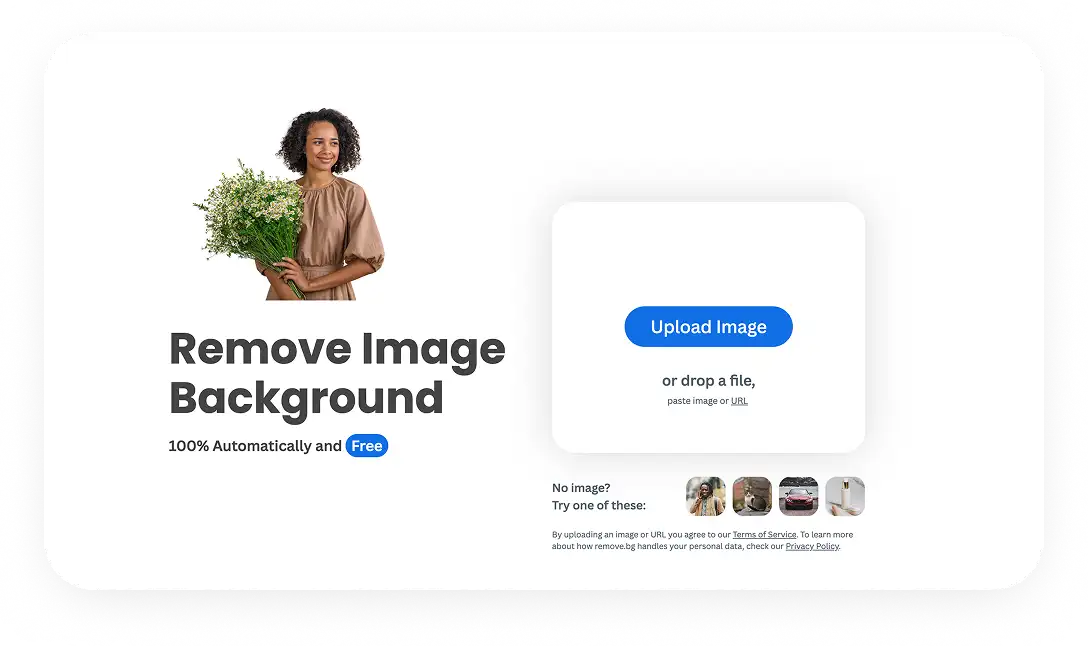
Remove bg
Remove bg is built specifically for AI background removal — nothing more — with a strong emphasis on speed and bulk processing. It takes about 2.5 seconds to process an image, and the workflow is extremely simple:
Upload your photo or photos
Download the result as a transparent PNG or Zip
You can use the tool through the web interface, desktop apps, mobile apps, or integrate it into your own products via their API.
Remove bg can handle an impressive 500 images per minute, making its biggest advantage the API and high-volume throughput.
It’s ideal for large e-commerce photoshoots, editorial batches, or lookbooks for major online retailers where you need to process hundreds or thousands of images quickly.
Advantages:
✅ Extremely fast processing speed
✅ Handles up to 50MP image resolution
✅ Robust API for developer integration
✅ Plugins for Photoshop, Figma, and other tools
Disadvantages:
❌ Free tier limited to low-resolution downloads
❌ Credit-based pricing can get expensive
How to Use AI Background Removal Tools for Best Results
While most AI tools follow the same simple 2–3 step process, background-removal quality can still vary depending on the input image.
Fortunately, there are a few easy things you can do to ensure you get the best possible results:
Start with a high-resolution image. algorithms detect edges more accurately when they have more pixel data to analyze, so use images over 1000 pixels on the longest side for best results.
Use images with strong directional lighting. Soft lighting tends to create smoother, lower-contrast edges, which can make background removal less accurate. Hard lighting, on the other hand, produces clear, well-defined lines between the subject and the background, resulting in much crisper masks and cleaner cutouts.
Use images with contrasting backgrounds. The more visual separation between your subject and background, the cleaner your results.
✅A person wearing a light tee against a dark background
✅A person wearing a dark tee against a light background
❌A person wearing a light tee against a light background
❌A person wearing a dark tee against a dark background
Avoid: images without soft shadows. Soft shadows beneath a subject are impossible to remove cleanly — even manually. They either get completely removed or leave artifacts behind. If you need a shadow, it’s usually better to add it back in afterward.
Export in PNG or WEBP. If you export the image as a JPEG you’ll usually get a solid background — not a transparent one. PNG and WEBP both support transparency, so choose either of these formats when exporting.
PNG — when you need to retain high resolution and detail
WEPB — when you need a compressed image to publish online
Bonus tip: Zoom in to 100% after processing and check the edges — AI tools can sometimes leave small artifacts, partial shadows, or rough patches. In many cases, you can fix these simply by running the tool again.
FAQ
Can I remove photo background on iPhone?
Yes! Most AI background removal tools work on mobile devices through web browsers or dedicated apps. Overchat AI, Remove.bg, Canva, and Adobe Express all offer mobile versions that function similarly to their desktop counterparts. Simply open the tool in your mobile browser or download the app, upload your photo, and the AI will process it just like on desktop. The main limitation is that some advanced editing features may be simplified or unavailable on mobile versions.
How to make an image transparent?
Making an image transparent means removing its background and saving it in a format that supports transparency. Upload your image to any AI background removal tool, let it process and remove the background, then download the result as a PNG file — a format that preserves transparent backgrounds. If you save as JPEG, the transparent areas will automatically fill with a solid color, usually white.
How to remove white background from image?
AI background removal tools handle white backgrounds the same way they handle any other background color. Upload your image to a tool like Overchat AI, Remove.bg, Fotor, or Adobe Express, and the AI will detect your subject and strip away the white background automatically. White backgrounds are actually easier for AI to process than busy or complex backgrounds because the contrast between subject and background is usually very clear.
How to change the background of a photo?
First, remove the existing background using any AI tool to create a transparent PNG. Then either use the same tool's background replacement feature to add a new backdrop, or import your transparent image into a design program like Canva or Photoshop. Most AI background removers include options to add solid colors, gradients, or upload custom background images. You can also layer your transparent cutout over any image in standard photo editing software.
Bottom Line
Sometimes you need to turn an image with a solid background into a transparent one — for example, when placing a person into a new scene or changing the backdrop color of a product shot.
Until very recently, the only reliable way to do this well was to use manual cutouts in Photoshop. This involved tracing the edge of your subject, refining it, and creating a cutout on a new layer — a complex process that required time and skill, and could easily go wrong for inexperienced users. In some cases, such as detailed photo editing, this is still necessary (though Photoshop’s subject-detection tools have improved a lot in recent years).
But in 2025/2026, AI tools have advanced to the point where manual work is barely necessary — background removal has essentially become a one-click process. We’ve looked at five online background removers that produce excellent results. Using any of them, you can quickly get a clean, transparent PNG of almost any subject.