If you’ve ever taken a photo that was cropped too tightly or shot a vertical image that needs to be landscape for a YouTube thumbnail, you’re probably wondering how to expand that image.
We know how frustrating it is when you realise you need to edit it afterwards, but stretching the image just makes it look distorted and pixelated.
Fortunately, you can expand your image using Photoshop or AI, which is better than simply enlarging the existing pixels.
Expanding an image means adding new AI-generated content beyond the original borders — different from upscaling (more pixels, same composition) and resizing (stretched pixels, lower quality).
Common use cases: fixing awkward crops, converting between aspect ratios, and adding space for text overlays.
Photoshop has two methods: Generative Expand (2024+, powered by Adobe Firefly Image 3) and Content-Aware Fill for simple textures like skies or water. Firefly is weaker than frontier models like Nano Banana 2 and GPT Image 1, especially on hands, faces, and text.
Overchat AI Image Extender is the fastest alternative — browser-based, no downloads or account, supports natural language commands, and bundles 50+ other AI image tools in the same workspace.
Aspect ratio presets to know: Instagram 1:1, Stories/Reels 9:16, LinkedIn Banner 4:1, YouTube Thumbnail 16:9.
Best practices: start with high-res sources, expand before other edits, keep expansion modest (the more AI invents, the less realistic it looks), and regenerate a few times to pick the cleanest result.
Don't expand when you can recrop the original or swap in a different photo from the same shoot — actual detail beats generated content.
What does it mean to expand an image?
To expand (or uncrop) an image means adding new content beyond the original borders. This is different from resizing, which stretches existing pixels and reduces quality.
When you expand an image, you need to generate realistic content to fill the new space. Most people do this manually in Photoshop by cloning in new sections of similar content, which is difficult, or by using AI expand tools — they are available in Photoshop as well as online.
Most people expand images to fix framing issues or adapt photos for different platforms.
Fixing awkward cropping or framing mistakes
Changing aspect ratios for different platforms (Instagram, LinkedIn, YouTube thumbnails)
Adding space for text overlays in marketing materials
Converting portrait shots to landscape (or vice versa)
Recovering lost details from previously cropped images
Creating more breathing room around a subject
Photo expansion use cases
If you’re wondering when it is useful to expand a photo, here are three real-world scenarios in which uncropping an image can save a lot of time and effort. These aren’t the only applications, but they might help you understand when AI uncroppers are most useful:
You shot product photos vertically for Instagram Stories, but now need them as 1:1 squares for feed posts — use expansion as a nifty trick to change your image aspect ratio — without ever taking the camera out of the bag for a reshoot.
Your professional headshot is tightly cropped, but LinkedIn's banner needs a 4:1 landscape format. Using online image extension, it’s super easy to add an office background or neutral space around you.
You have a great thumbnail image but it's portrait-oriented, but your channel needs 16:9 landscape — time to expand!
How to Expand an Image in Photoshop
If you have Photoshop and want full creative control over the expansion, you can use built-in AI features and tools. Here's how to expand an image in Photoshop using two different methods.
Using Generative Expand (Photoshop 2024+)
Open your image in Photoshop
Select the Crop Tool (press C)
Drag the crop handles outward to set your desired canvas size
Click Generative Expand in the Contextual Task Bar
Leave the prompt box empty (or type a description for specific content)
Click Generate and wait 10-15 seconds
Choose from 3 AI-generated variations
Click Generate again if you want more options
Tips: Use text prompts to guide what the AI generates, compare multiple variations side-by-side, and regenerate until you get the result you want.
Using Content-Aware Fill (Older Photoshop Versions)
Go to Image → Canvas Size and increase dimensions
Use the Rectangular Marquee Tool to select the empty area
Go to Edit → Fill and choose Content-Aware
Adjust settings and click OK
Clean up any imperfections with the Clone Stamp or Healing Brush
This is the preferred pre-AI method used by most professional photographers because it gives you the most control over the end result. It works well with simple repeating patterns, solid colours and gradients (such as clear skies, empty grassy areas and water surfaces), but expanding an image featuring architecture, cars or people takes serious skill and a lot of time.
When to use which method?
Use Generative Expand for more complex scenes and patterns.
Use Content-Aware Fill for extending simple textures and backgrounds — skies, water, solid background, out of focus areas.
In general, Content-Aware Fill is faster, but Generative Expand is more accurate. That being said, it’s not the most accurate image extender out there (more on this later).
Photoshop limitations
The biggest limitation of image enlargement in Photoshop is the resulting loss of quality, particularly when enlarging complex objects such as human hands, signs with letters or faces.
This is because Photoshop's AI-powered tools rely on the Adobe Firefly Image 3 model, which is inferior to the current flagship models: Nano Banana 2 and GPT Image 1.
The same can be said of specialised image expansion tools powered by these models.
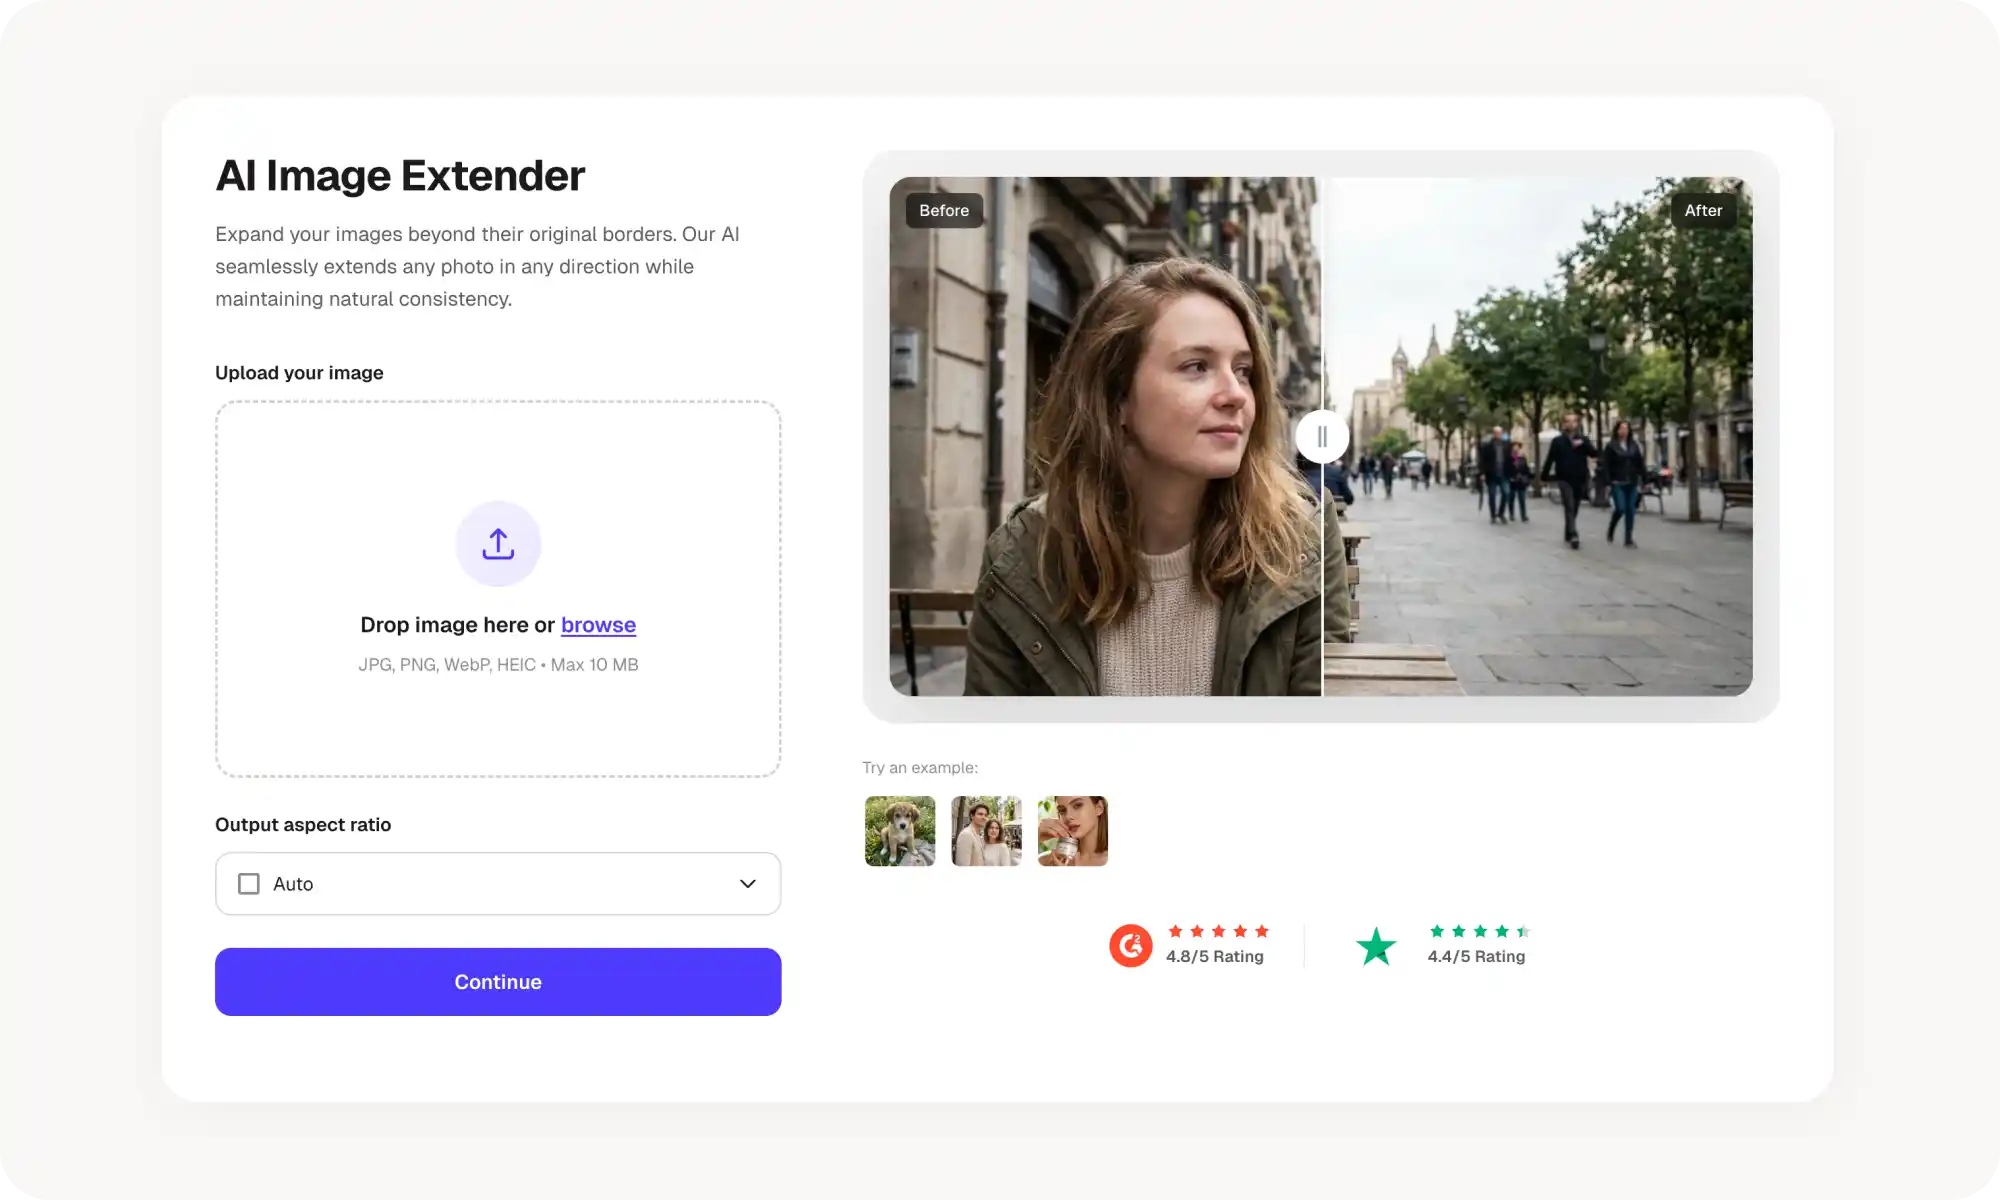
The Easiest Way to Expand an Image — Overchat AI Image Extender
Not everyone has Photoshop or wants to learn complex software. Overchat AI offers a faster solution that works directly in your browser without downloads. If you need to uncrop a photo quickly, this is the simplest option.
What Is an AI image extender?
An AI image expander is an online tool that uses artificial intelligence to analyze your photo and generate realistic content beyond its original borders. Unlike Photoshop, the entire process is completely automatic — you don’t need to do anything beyond selecting a few settings, like choosing the right aspect ratio (more on that later).
Why use Overchat AI?
One-click edits. The context-aware extension is accurate and automatic.
Instant results. Preview the expanded image in seconds.
Natural language commands. Describe what you want in plain English, like “Expand more to the left”
50+ other AI image tools. Access background removal, upscaling, object removal, and more in one place.
Everything lives in a single workspace, so you can upload once and apply multiple edits without switching between different apps or websites.
Preview the result and download your expanded image
No account required to get started. It works on any device with a browser, maintains your original image quality, and delivers results in seconds.
Photoshop vs Overchat AI: which should you use?
Photoshop gives more manual control but it’s expensive and has a learning curve.
Overchat AI is faster, cheaper, and easier to use, but the only way to fine tune results is through regeneration.
Factor
Photoshop
Overchat AI
Cost
$22.99/month
$4.99/week
Learning curve
Steep
None
Control over results
High (prompts, variations, manual cleanup)
Basic
Speed
Minutes to hours
A few seconds
Best for
Professional work, complex edits, batch processing
Quick fixes, one-off tasks, beginners
Common aspect ratios for expanded images
Knowing your target dimensions before you expand saves time and prevents rework. If you're creating content for a specific platform, expand to the right aspect ratio from the start instead of cropping again later.
Instagram Post: 1:1 (1080 x 1080px)
Instagram Story/Reels: 9:16 (1080 x 1920px)
LinkedIn Banner: 4:1 (1584 x 396px)
Facebook Cover: 2.7:1 (820 x 312px)
YouTube Thumbnail: 16:9 (1280 x 720px)
Most AI expanders offer these as presets, so you don't need to calculate dimensions manually. Just select the aspect ratio in the tool.
Here's a "Best Practices for Expanding Images" section you could add after the Photoshop vs Overchat comparison:
Best practices for expanding images
Follow these tips to save time and get the best possible results — both with Photoshop and AI image expansion tools
Start with high-resolution images. Low-resolution photos produce low-quality expansions. If your original image is blurry or pixelated, the AI will generate blurry extensions to match. Use the highest resolution version you have — at least 1080px on the shortest side. You can also use Overchat AI image upscaler before expanding to losslessly increase dimensions of the image and unblur it.
Avoid images with text in Photoshop. Photoshop struggles with this. If your photo features signs, billboards, or any text in the frame — use an AI image expander, unless you’re going to clone-stamp by hand. Alternatively, add the text as an overlay after expanding the original photo.
Expand before other edits. Do your expansion first, then apply filters, color corrections, or text overlays. This prevents quality loss from multiple rounds of processing and ensures your adjustments apply evenly across the entire image.
Check the edges carefully after expanding. Zoom in on where the original photo meets the AI-generated area and look for color mismatches, blurry transitions, or repeating patterns that look unnatural.
Don't expect perfect accuracy. The AI invents content based on what it sees, which is why when the expansion adds a lot of new information some of that visual data won’t match the real life — this is normal and expected.
Keep expansion reasonable. The more the AI has to invent, the less realistic it looks.
Use prompt descriptions (when available). Tools that accept text prompts let you guide the expansion.
Generate multiple times. Most AI tools let you regenerate with one click. Try 3-4 variations and pick the one that looks most natural.
When not to expand an image
Recrop instead of expand. If you cropped too aggressively but still have the original file, start over with a looser crop. This preserves actual detail instead of generating invented content.
Use a different composition. If a portrait needs to be landscape, expanding might look forced. A different photo from the same shoot might work better at your target aspect ratio.
When you don’t really need full coverage. Some platforms let you adjust the focal point or safe area. Instagram Stories, for example, let you position content within the frame even if the full image doesn't fill it perfectly.
Frequently asked questions (FAQ)
Can I uncrop an image without losing quality?
Yes. AI-powered tools generate new pixels that match your original image rather than stretching existing ones. The original portion of your photo stays at full quality while the expanded areas are created fresh.
What file formats work for image expansion?
Most tools support JPG, PNG, HEIC, and WEBP formats. Some also accept GIF and BMP files. Check your specific tool's upload requirements if you're working with less common formats.
How much can I expand an image?
This depends on the tool, but most allow 1.5× to 3× expansion in any direction. Larger expansions may produce less accurate results because the AI has to invent more content with less context from the original image.
Is AI image expansion free?
Many tools offer free tiers with daily limits on how many images you can expand. Overchat AI lets you expand images without creating an account, though premium features may require a subscription.
Can I expand both sides of an image at once?
Yes. Using AI expanders you can choose which direction to expand — left, right, top, bottom—or expand multiple sides simultaneously. This is useful when you need to center a subject or add space on all edges.
Can I expand images on my phone?
Yes! Browser-based tools like Overchat AI work on mobile devices without downloading apps. To use it:
Open the tool on your iPhone, iPad or android device in Safari or Chrome
Upload your photo
Select your aspect ratio
Click Continue
Download the result
The process is the same as desktop but fits your phone screen. But wait, what about Photoshop?
This isn’t as straightforward — Photoshop has a mobile app, but it requires a subscription and doesn't include all the desktop expansion features.
Bottom Line
Expanding images is now simple thanks to AI technology. You can fix cropping mistakes, adapt photos for different platforms, and add breathing room around subjects in seconds.
Key takeaways:
Expanding an image means adding new AI-generated content beyond the original borders.
You can expand images in Photoshop using the Generative Expand, though this feature comes with a steep learning curve — and equally steep subscription price.
Overchat AI Image Expander offers a fast, free alternative that works in your browser.
Try Overchat AI to expand your first image in seconds without any downloads or sign-ups.