You want a professional headshot for LinkedIn, resume, or ID photo, but hiring a photographer costs $200+ and requires scheduling, traveling, and waiting for edits. There's a simpler way.
In this article, we’ll explain how to take a professional headshot at home with just your phone and basic equipment. We’ll talk about:
What makes a headshot work
How to set up your shot
Common mistakes that make home headshots look amateur.
At the end, we'll also cover an AI alternative that generates professional headshots from your selfies in minutes.
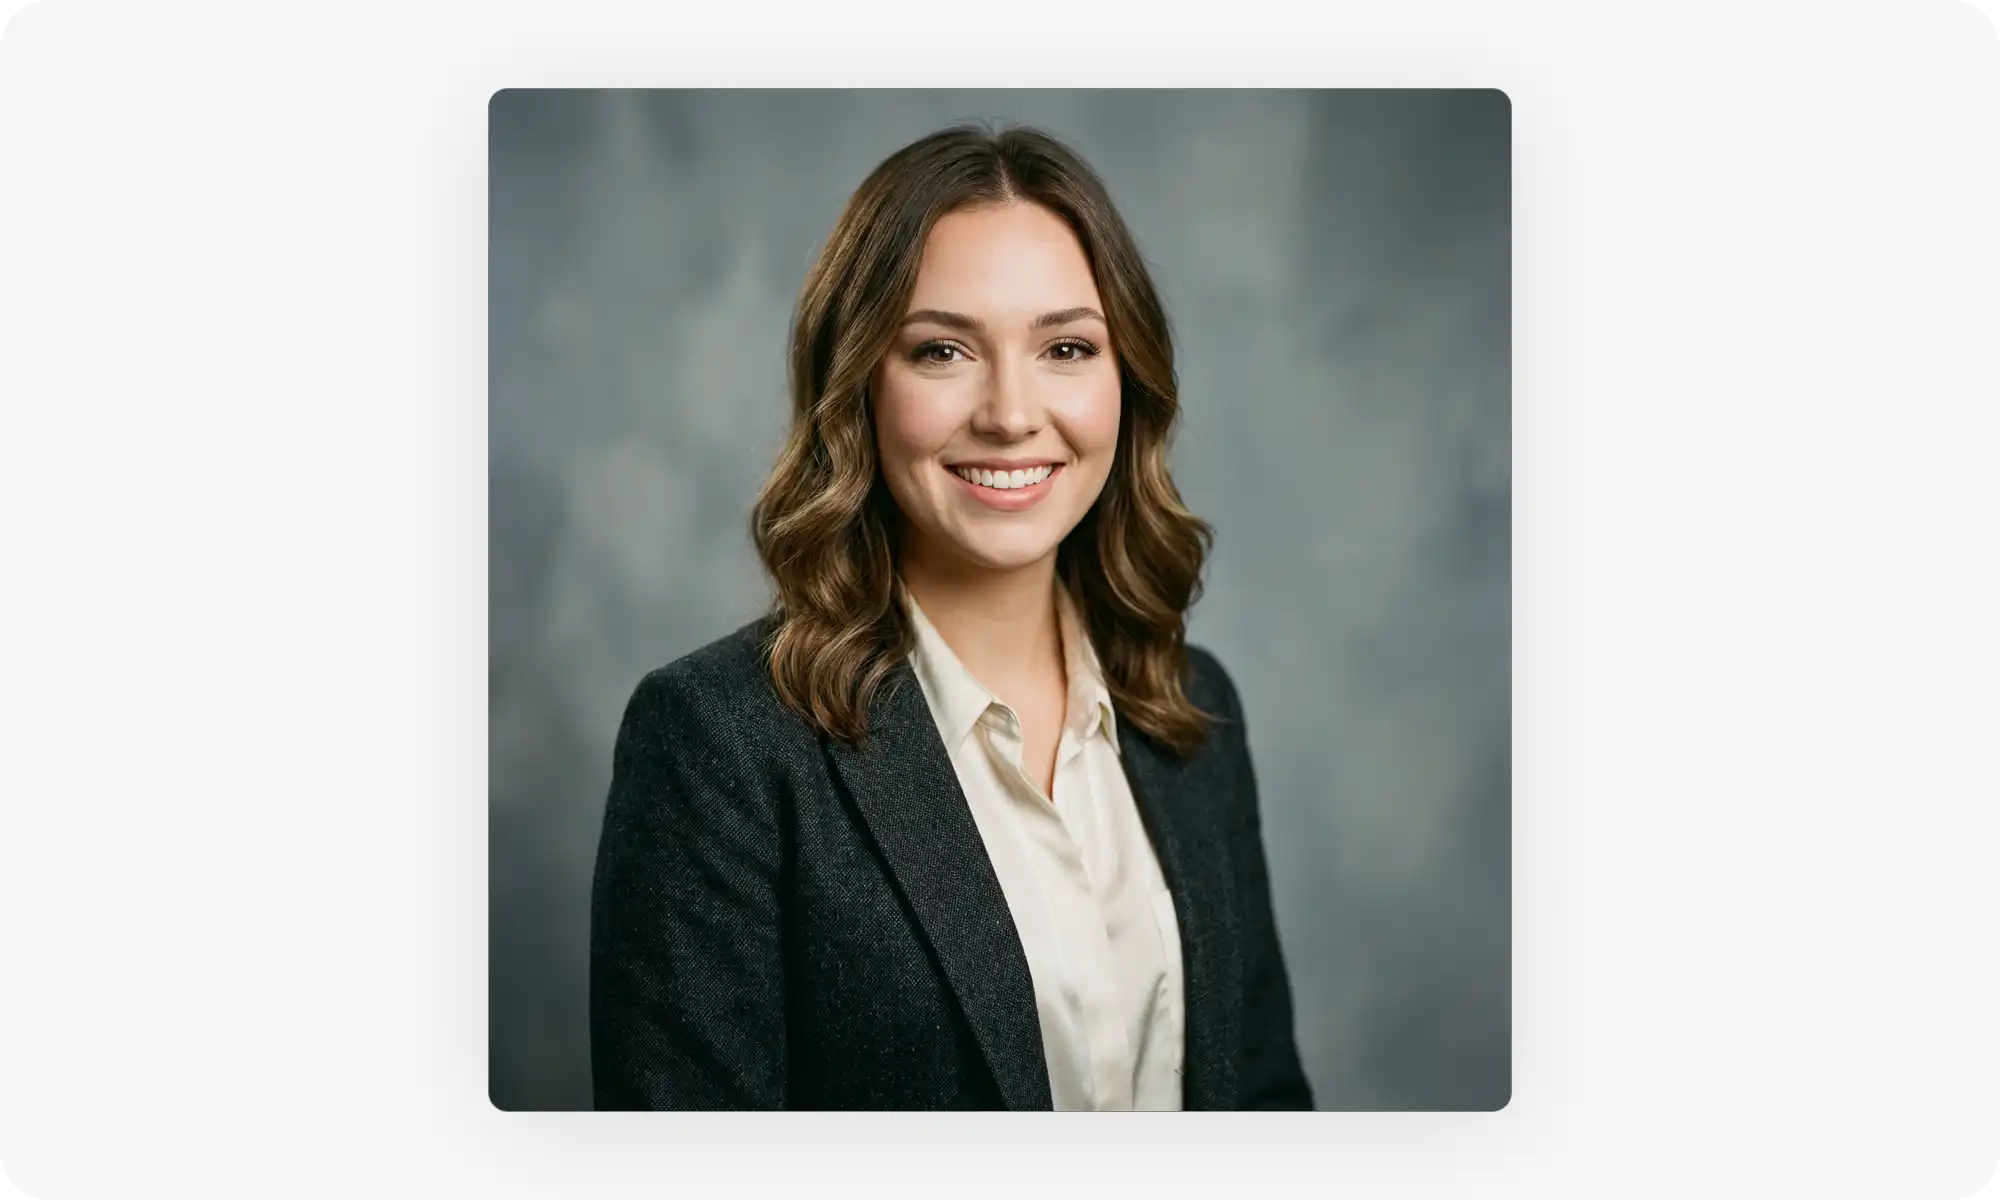
A headshot is a shoulders-up professional photo — the focus stays on your face, the background is simple, and your clothing doesn't compete for attention.
What makes one work: approachable expression, soft even lighting, clean background, correct framing (eyes in the top third), solid-color smart-casual clothing, and sharp high-res image quality.
Taking one at home in 6 steps: use natural window light 3–6 feet away (diffuse with a white sheet if needed), pick a clean neutral wall, set the camera at eye level 3–5 feet away, wear solid colors (navy, charcoal, jewel tones — skip pure white and logos), relax your posture with your body angled slightly, and shoot 20–30 variations.
Common mistakes to avoid: skipping post-processing, looking at the phone screen instead of the lens (tape near the lens as a visual anchor fixes this), squinting in bright light, and using the wrong dimensions for each platform.
Dimension cheat sheet: LinkedIn minimum 400x400 (1:1 ratio, 8MB max), standard print headshot 8x10 inches at 300 DPI, and always leave breathing room so you can crop later.
The AI alternative: tools like Overchat AI Headshot Generator turn any selfie into a studio-quality business headshot in minutes, using diffusion models trained on thousands of professional headshots.
Cost comparison: professional photographers charge $200–500 per session in the US; AI generators produce comparable results for a fraction of the price.
Modern smartphones can absolutely produce professional-grade headshots — good lighting and a clean background matter more than the camera.
What is a headshot?
A headshot is a professional photo that shows you from the shoulders up. It's designed to put your face front and center while maintaining a clean, polished look.
Unlike casual photos, headshots follow specific standards:
The focus stays on your face and expression
The background stays simple and uncluttered
Your clothing looks professional without drawing attention away from you.
Headshots serve a clear purpose: they help potential employers, clients, and professional connections put a face to your name. A good headshot builds trust and makes you memorable in professional settings.
What makes a good headshot?
Your expression. Your expression should be approachable and confident—think of how you'd greet a client or colleague you respect. A genuine smile or calm, friendly look works better than a forced grin.
Lighting. Soft, even light eliminates harsh shadows and highlights your features naturally. Avoid overhead lights that create dark circles under your eyes or bright flashes that wash out your skin tone.
Background. It needs to be simple. Busy backgrounds with plants, posters, or clutter distract from you and look unprofessional.
Framing. Framing and composition follow basic rules:
Your eyes should be in the top third of the frame
Leave a small amount of space above your head
Center yourself or use a slight angle
Keep your shoulders visible for context
Smart clothing. Choose solid colors and avoid busy patterns and graphics, unless you’re in a creative industry. Go for smart-casual or business-casual clothes.
Image quality. Your headshot should be sharp, well-lit, and high enough resolution to use across different platforms.
How to take a professional headshot at home?
To take a good headshot, just follow these 6 simple steps:
Step
Key Insight
How to Do It
Pro Tips
1. Find the right lighting
Use natural light from a window
• Position facing large window • Mid-morning or mid-afternoon • Stand 3-6 feet from window
• Diffuse harsh light with white sheet • Use white poster board as reflector • Avoid overhead ceiling lights
2. Choose a clean background
Use solid neutral wall
• White, gray, or neutral colors • Stand 3-4 feet from wall • Remove all clutter from frame
• Small adjustments matter • More options to choose from • Don't settle for one shot
1. Find the right lighting
Natural light is your best friend for headshots.
Position yourself facing a large window during mid-morning or mid-afternoon when the light is soft and indirect.
Stand about 3-6 feet away from the window. If the light looks too bright or creates harsh shadows on one side of your face, hang a white sheet over the window to diffuse it. You can also use a white poster board or reflector on the opposite side to bounce light back and fill in shadows.
Avoid overhead lighting from ceiling fixtures. It casts shadows under your eyes, nose, and chin that age you and create an unflattering look. If you must use artificial light, position lamps at face level on either side of you.
2. Choose a clean, simple background
White, gray, or any solid neutral color works well. Choose a wall and position it behind you, making sure nothing else appears in the frame: watch out for furniture edges, picture frames, doorways, or clutter.
Stand 3-4 feet away from the wall. This distance prevents harsh shadows from appearing behind you and creates a slight blur that looks more professional. If your wall has texture or minor imperfections, this distance will soften them.
3. Set up your camera at the right height and distance
Position your camera at eye level or slightly above. This angle is most flattering and feels natural to viewers. Cameras positioned too low make you look like you're looking down at people, while too high makes you appear small.
Place your camera 3-5 feet away from you. Use your phone's portrait mode or a camera with a 50mm lens equivalent if possible—this focal length closely matches how human eyes see and prevents distortion. Closer distances can warp your features and make your nose look larger.
4. Wear appropriate clothing
Choose solid colors that complement your skin tone but don't overpower your face. These colors usually photograph well:
Navy
Charcoal
Black
Jewel
Beige
Camel
Most importantly, avoid pure white as it can blend with light backgrounds. Also keep your graphic tee in the drawer for the photoshoot — you want to showcase yourself, not Nike logo.
5. Practice your expression and posture
Some people find it difficult to relax on camera and end up looking stiff. Below is a quick routine to set up for your home photoshoot and avoid that look:
Sit or stand up straight with your shoulders back but relaxed
Angle your body slightly to one side while keeping your face toward the camera — this creates a more dynamic, professional look than facing completely forward.
Relax your face, then think of something that makes you genuinely happy or confident.
Remember: A real smile uses your eyes, not just your mouth.
6. Take multiple shots
Shoot 20-30 photos with slight variations in your expression, head tilt, and shoulder angle. Small adjustments make a big difference, and you'll have options to choose from instead of settling for one mediocre shot.
Typical mistakes to avoid
1. Skipping post-processing
Raw photos straight from your camera rarely look their best. Professional photographers always edit their shots, and you should too. Thankfully, today most phones have built-in editing tools that let you fine-tune exposure, sharpen details, and adjust skin tones. But don't go overboard — heavy filters and excessive smoothing look fake.
2. Not looking directly into the camera
Looking directly at the camera creates connection and confidence, which works best for most professional headshots. But many people accidentally look at their phone screen instead of the lens, creating a disconnected, unfocused appearance.
Here’s an easy fix: Mark your camera lens with a small piece of tape if you're using a phone.
This gives you a clear target and prevents that "looking slightly off" effect that makes headshots feel awkward.
3. Squinting
If you're shooting in bright light, your eyes naturally narrow, making you look uncomfortable or strained. This is why diffused, softer light produces better results—you can keep your eyes naturally open and relaxed.
4. Using the wrong dimensions
Different platforms require different requirements when it comes to image dimensions and resolution:
LinkedIn:
Profile photo: 400 x 400 pixels minimum (up to 7680 x 4320 pixels maximum)
File size: 8MB maximum
Format: Square (1:1 ratio)
Social media:
Instagram: 320 x 320 pixels minimum (displays at 110 x 110)
Facebook: 176 x 176 pixels (desktop), 196 x 196 pixels (mobile)
Twitter: 400 x 400 pixels minimum, 1500 x 1500 pixels maximum
Print:
Standard headshot: 8 x 10 inches at 300 DPI (2400 x 3000 pixels)
Resume or business cards: 5 x 7 inches at 300 DPI
Leave breathing room around your head and shoulders when shooting. You can always crop tighter, but you can't add back space that wasn't captured. Aim to include from mid-chest up with space above your head.
Also keep in mind that centering yourself in every shot isn't always ideal. The rule of thirds applies to headshots too — positioning your eyes along the top third line often creates a more visually interesting composition than perfect center alignment.
The best alternative to professional headshots — Overchat AI Headshot Generator
It’s entirely possible to create a professional headshot at home, but the process takes some skill. Ideally, you’ll also need to use professional photography equipment, which is expensive, and setting up your at-home-studio will take time.
If you need professional results faster, consider using an AI headshot generator — a tool that can transform any selfie into a polished business headshot.
What is a headshot generator?
A headshot generator is an online AI tool that creates professional headshots from selfies. It’s very easy to use:
Upload a selfie or a casual picture
The AI generates studio-quality headshots using a process called diffusion.
The technology works by training on thousands of professional headshots.It then applies this knowledge to your photos.
How to use Overchat AI Headshot Generator?
Using Overchat AI Headshot Generator is straightforward and takes just a few minutes:
Upload a selfie of yourself from different angles — any picture will do.
Choose your preferred style from the available options.
Let the AI process your images. This typically takes a few seconds.
Done! Just review and download your headshot.
For best results, use clear, well-lit photos where your face is visible, but our AI technology is very smart and can even create headshots from photos where your face is partially obstructed.
Frequently Asked Questions (FAQ)
How much does a professional headshot cost?
Professional photographers typically charge $200–500 for a headshot session in the US. This includes the shoot, editing, and delivery of final images. Prices can be cheaper in Europe or other parts of the world, so check with your local freelancers for a specific quote..
Can I use my phone for a professional headshot?
Yes, modern smartphones have really good cameras that are capable of taking images that look professional. On balance, in bad lighting even a good DSLR will produce an image that doesn’t look high-quality. Along those lines, as long as you set up proper lighting and choose a clean background, you can take a professional headshot on your iPhone or smartphone.
What should I wear for a headshot?
Wear solid colors that complement your skin tone. Business-smart looks are a safe bet: blazers, button-up shirts, knitwear or jackets will work. Things to avoid are busy patterns, large logos, and pure white clothing — these will pull attention away from your face.
How often should I update my headshot?
Whenever your appearance changes or you want a fresh look. If you change your hairstyle, start wearing glasses, or, if you’re a guy, grow facial hair — these are all good times to refresh the headshot. The headshot should look like the present you, so business contacts can easily recognize you when meeting in person.
What's the difference between a headshot and a portrait?
A headshot focuses specifically on your face and shoulders for professional purposes.
Portraits are broader, can include more of your body, and serve artistic or personal purposes rather than strictly professional ones.
How good are AI headshot generators?
Really good — modern AI models produce results that rival those of professional photographers and are better than most people will be able to achieve at home. The output image will be indistinguishable from a real photograph and will capture your likeness perfectly. However, this depends on the AI model used — some tools will work better than others depending on the technology powering them.
Bottom Line
You don’t need expensive gear or even hiring a photographer to create great professional headshots at home — with the right approach, it’s easy to achieve polished images just your phone, or, indeed, by generating headshots with AI.
Key takeaways:
A headshot is a professional photo showing you from the shoulders up, designed for business profiles and networking.
Good headshots showcase your personality and present you in the best possible way while adhering to strict guidelines: soft lighting, simple backgrounds, centered composition.
It’s possible to take professional headshots at home — even on an iPhone.
Find natural light from a window, position yourself 3-6 feet away, and use a plain wall as your background.
Set your camera at eye level, 3-5 feet away, and use a tripod or stable surface to keep it steady.
Wear solid colors that complement your skin tone, keep jewelry minimal, and make sure your clothes are wrinkle-free.
Practice your expression and posture — angle your body slightly while keeping your face toward the camera.
When in doubt, use AI headshot generators like Overchat AI to create professional headshots from your selfies in minutes without expensive equipment or photographer fees.
AI headshot generators like Overchat AI can create professional headshots from your selfies in minutes.
At the end of the day, it doesn’t matter how you decide to create your headshot, the goal is the same: present yourself professionally. After all, your headshot is often the first impression you make, so it’s worth it to invest the time to get it one hundred percent right.